Loading Your Google PPC Campaign into Google Ads Editor
Detailed instructions
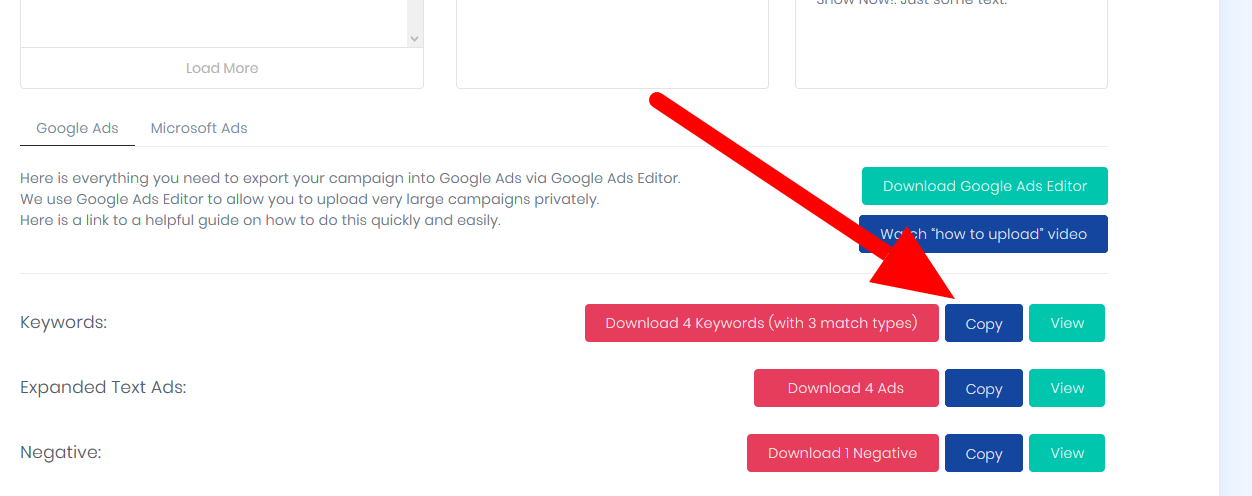
Your first step: once you've built your campaign, when you're on the Preview & Export tab, click the button to copy your keywords.
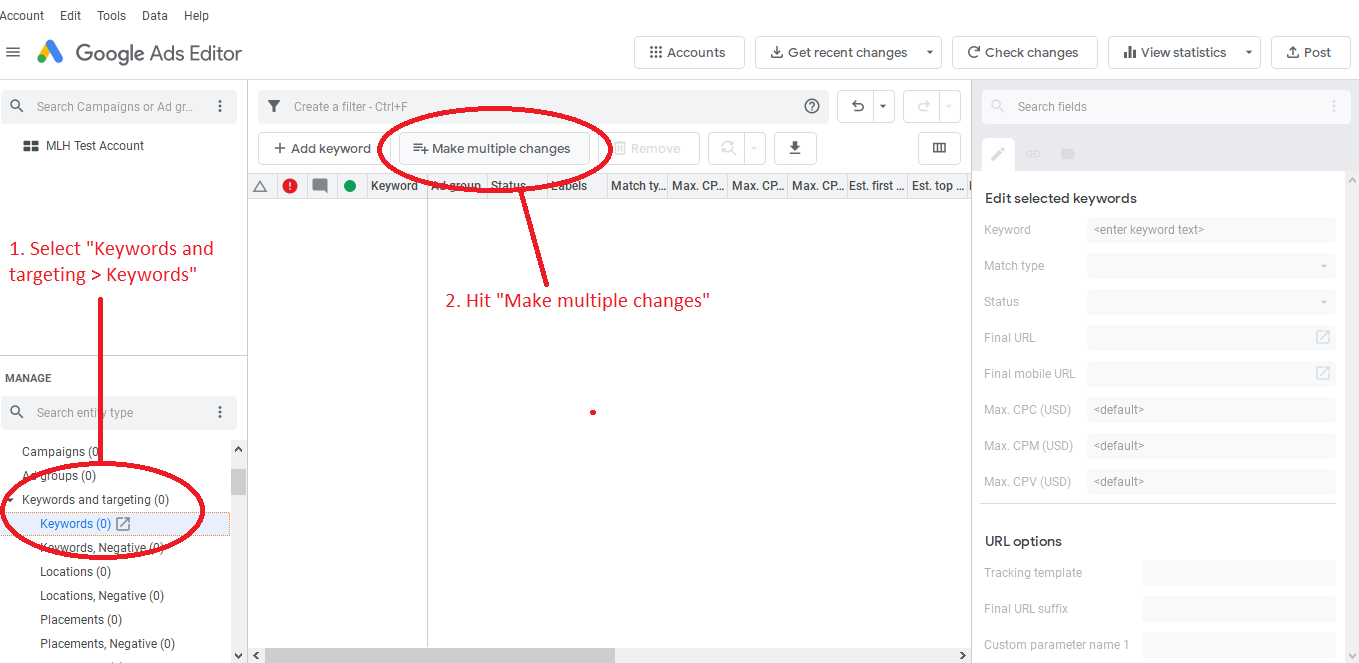
Then open your account in Google Ads Editor. From the menu on the left, click "Keywords and Targeting > Keywords" and then go hit the "Make Multiple Changes" button above the keyword table.
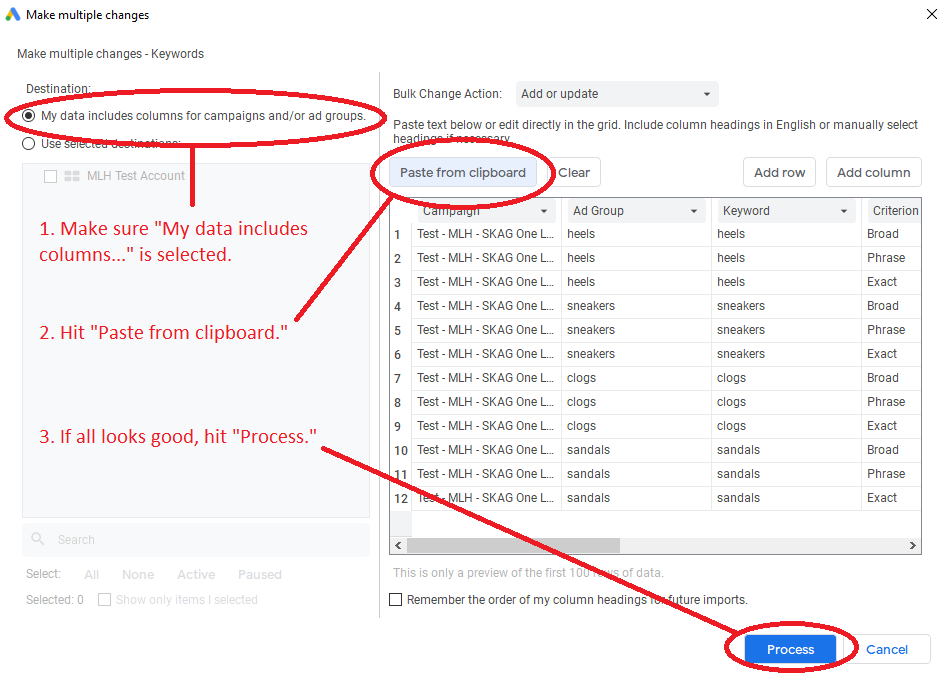
In the dialogue box that pops up, first make sure you select "My data includes columns for campaigns and/or ad groups" at the upper right. Then press "Paste from clipboard." The spreadsheet will populate with your keywords. If everything looks fine, go ahead and hit "Process."
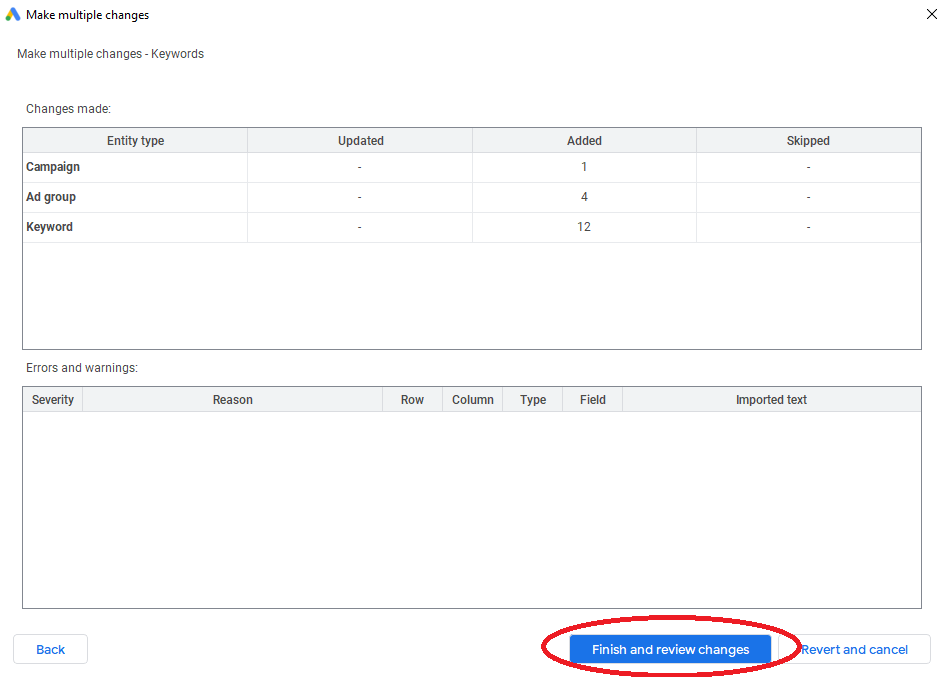
In the next dialogue box, if everything looks all right, click "Finish and Review Changes."
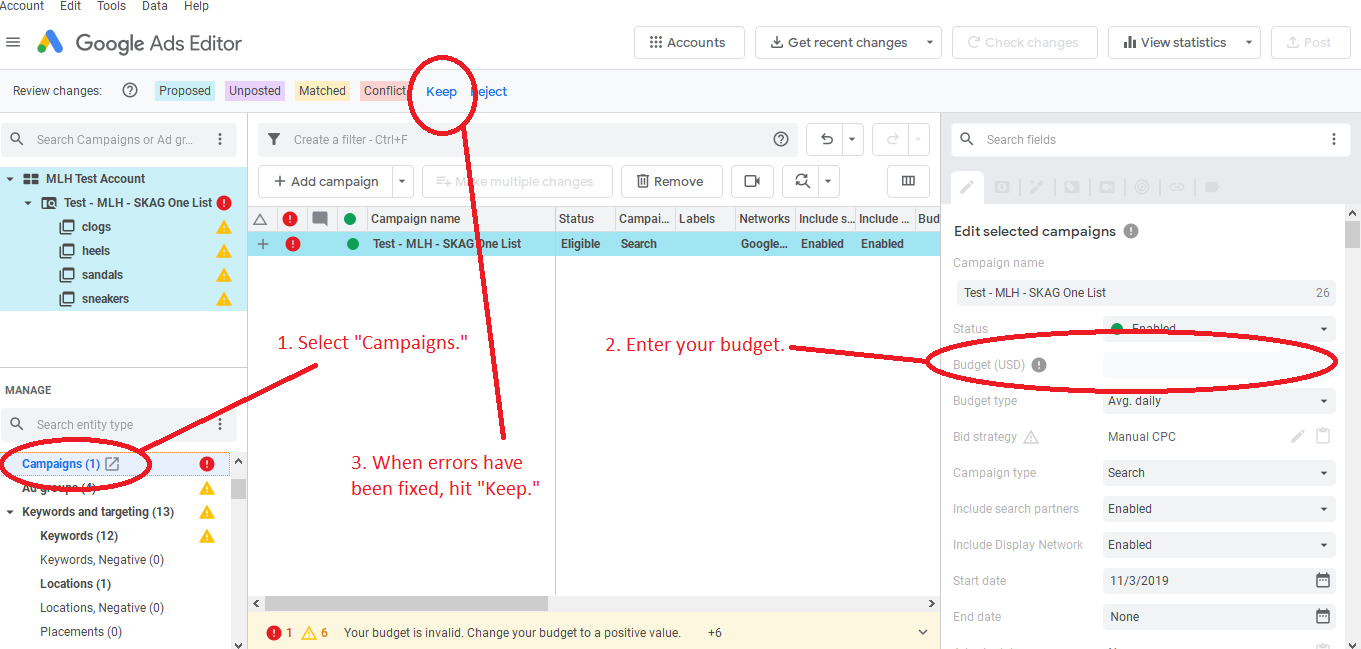
One error you'll get will be a warning about a lack of a budget: this is easy to fix. Just select the campaign and then add your budget to the right-side panel. Once everything looks good, hit "Keep" in the Review Changes bar at the top.
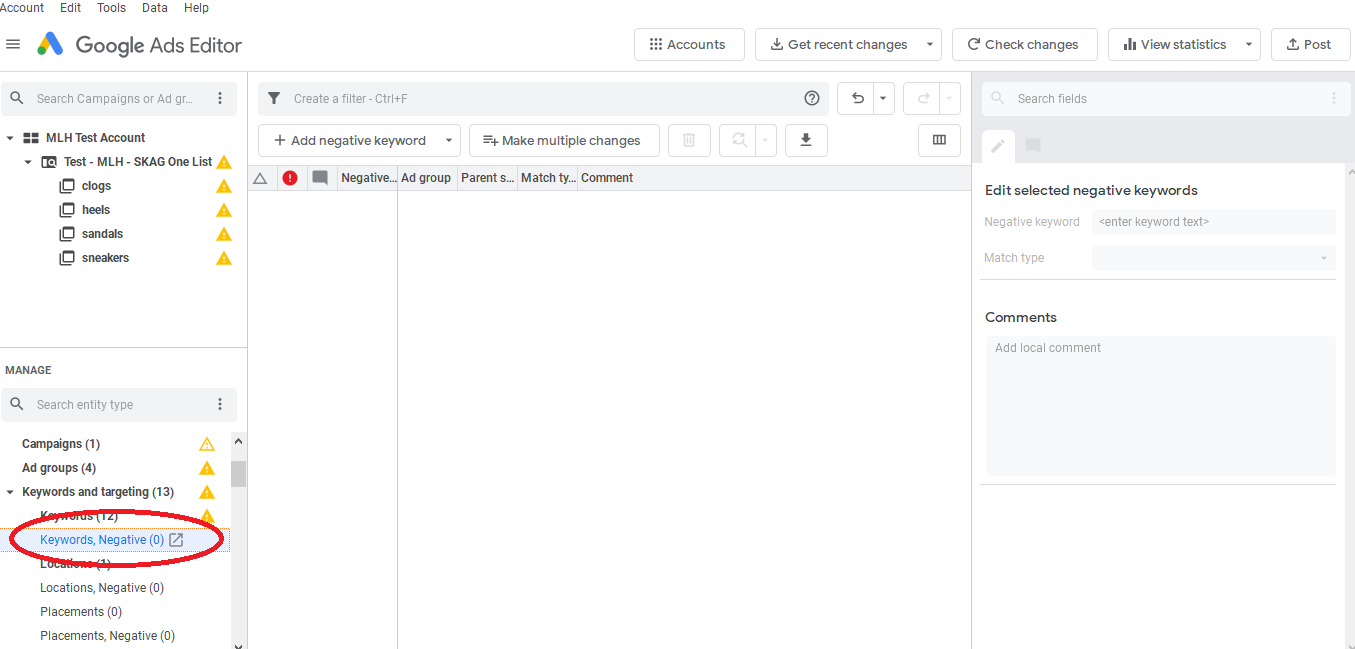
If you have negative keywords, SpeedPPC provides these as a separate download. You'll follow the same steps to import them to Google Ads Editor, except you'll start in the "Keywords, Negative" section of "Keywords and Targeting."
When all your keywords have been loaded, go back to SpeedPPC to get your ads export. Again, you'll want to hit "Copy." The steps you'll follow here are again similar, but you'll start by highlighting "Ads" and then your ad type (Expanded Text Ads, Responsive Search Ads, or Call-only Ads). Hit the "Make multiple changes" button, and from here you'll follow the same steps as for adding keywords.

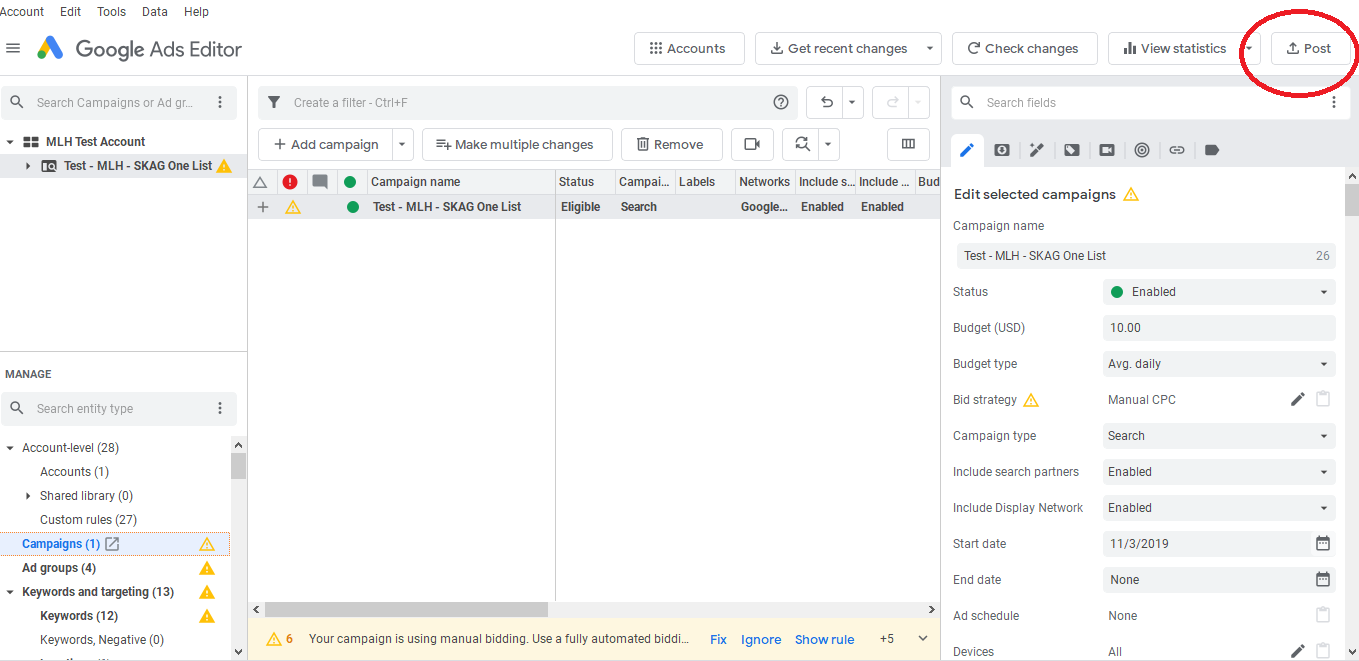
Once that's done, your campaign should be ready for upload. To do this, press "Post" all the way at the upper right.