Loading Your Microsoft Ads Campaign into Microsoft Advertising Editor
- Get Changes: Get your campaign details from the Microsoft Ads live website to your Editor.
- Post: Post your changes in Editor to Microsoft Ads live.
- Import: Get campaign details from a file or Google Ads.
- Export: Download the campaign details in your Editor to a file.
- View Statistics: Show campaign performance.
Vertical Pane: This is where you can edit your campaign settings.

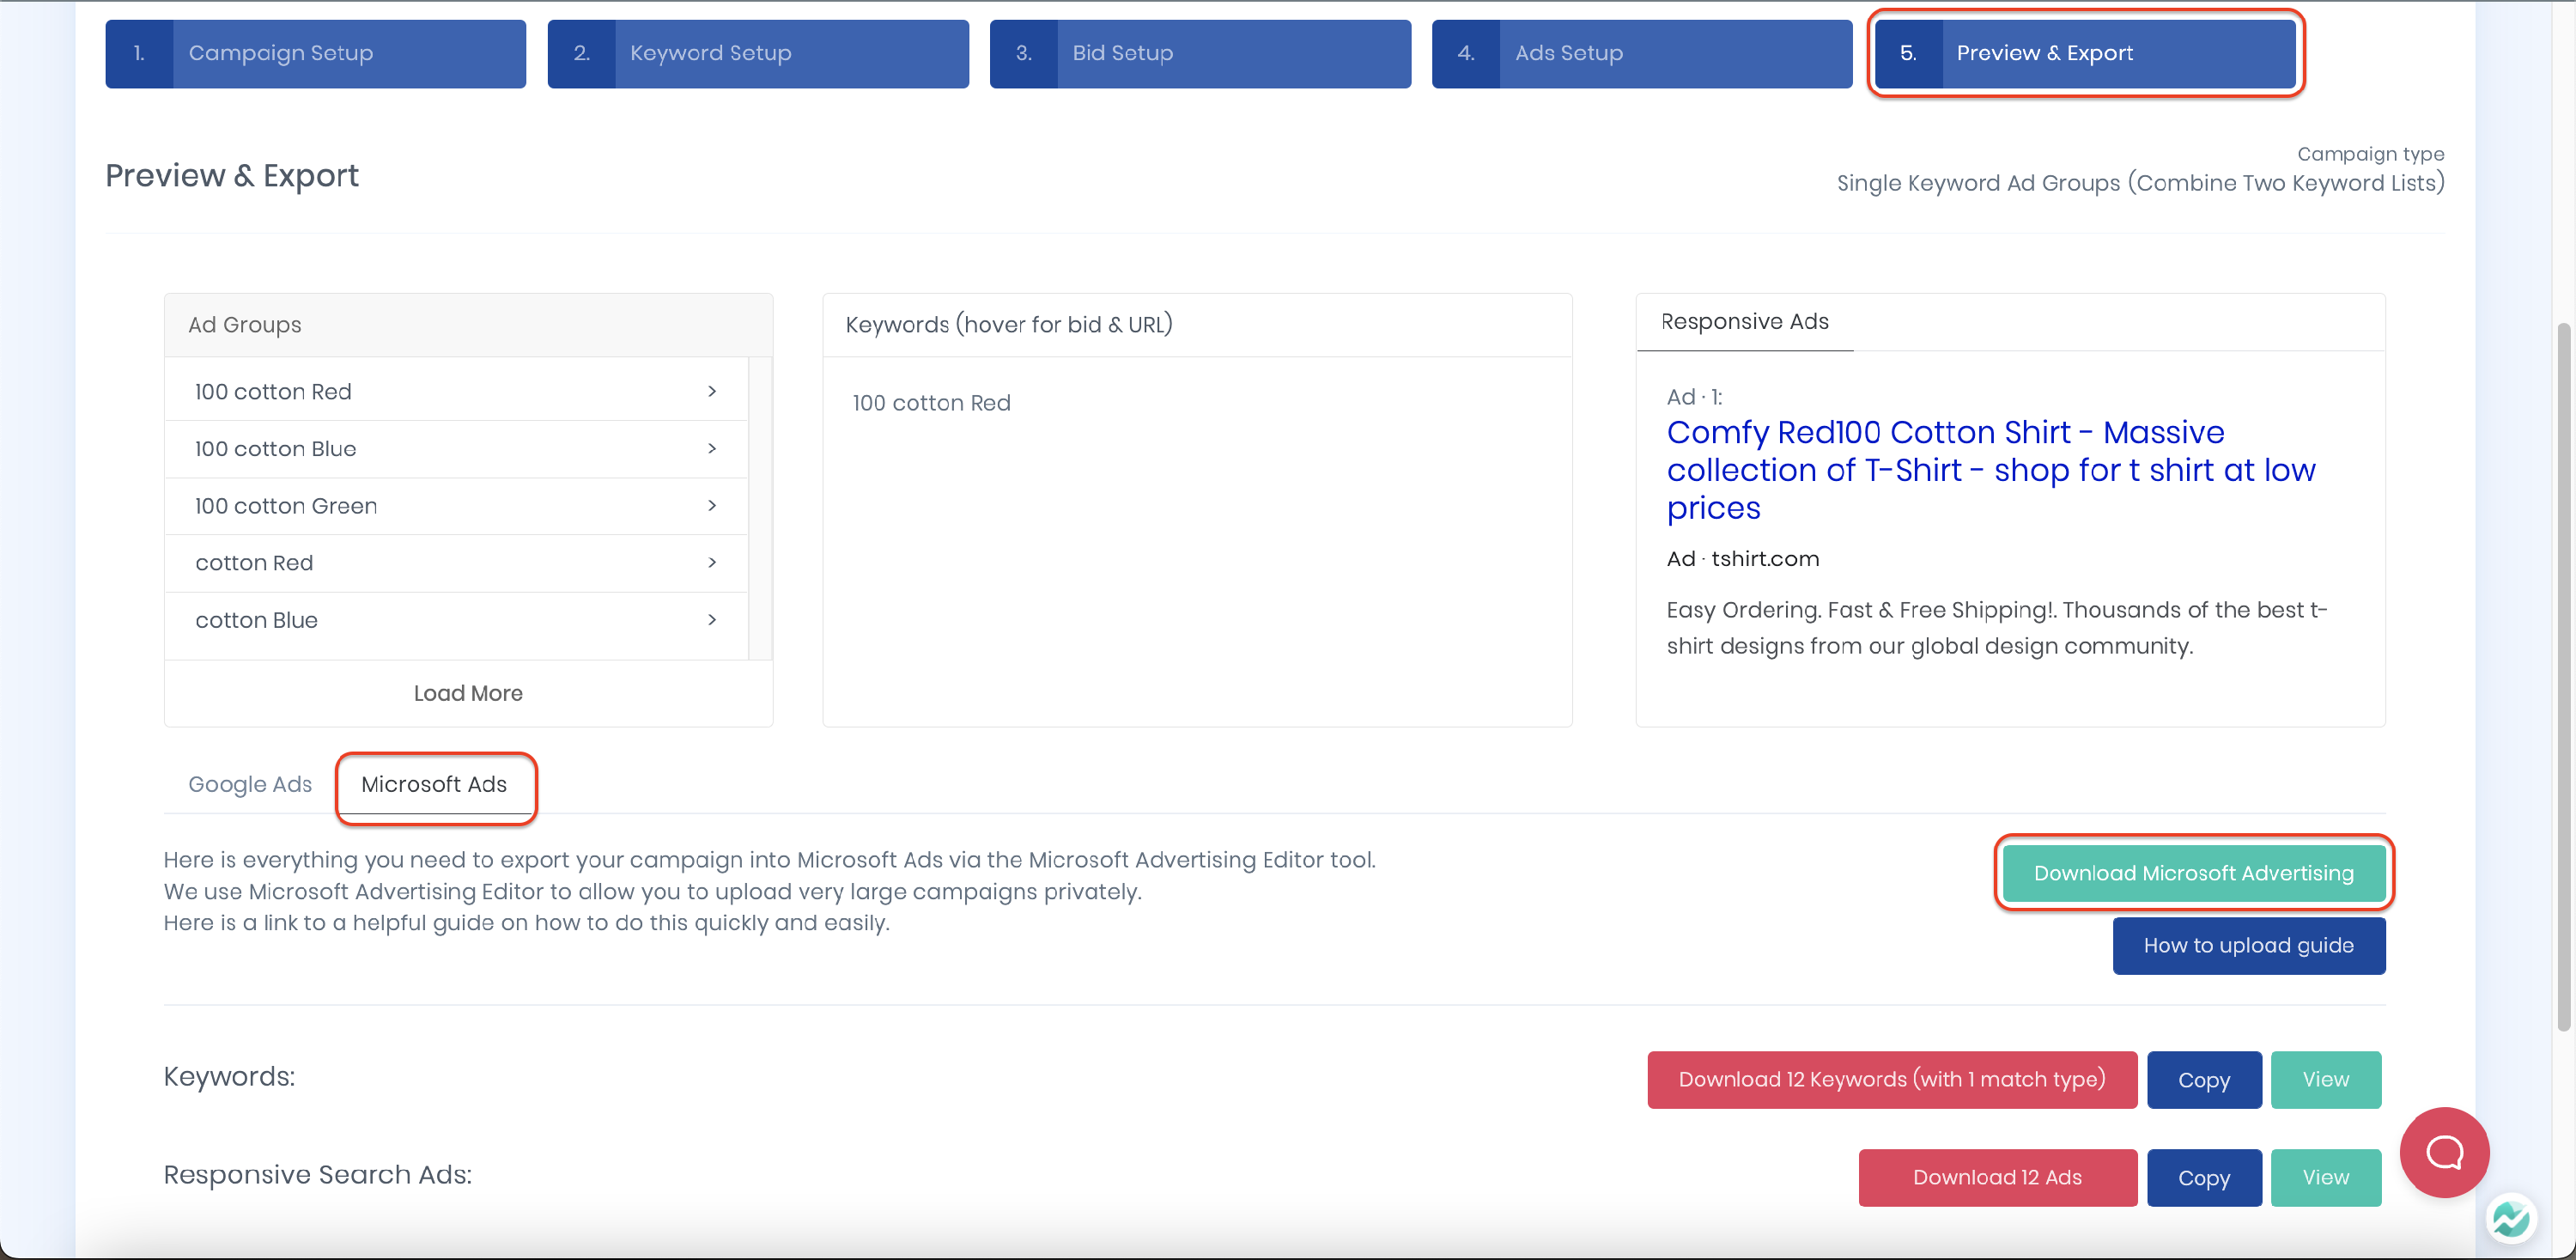
On the Preview and Export Section, Click the Microsoft Ads Tab for your MS Ads campaign details. If you don't have the Microsoft Ads Editor installed yet, you can click the Download Microsoft Advertising, which will route you to the MS Ads website, where you can download the Editor for Mac and Windows.
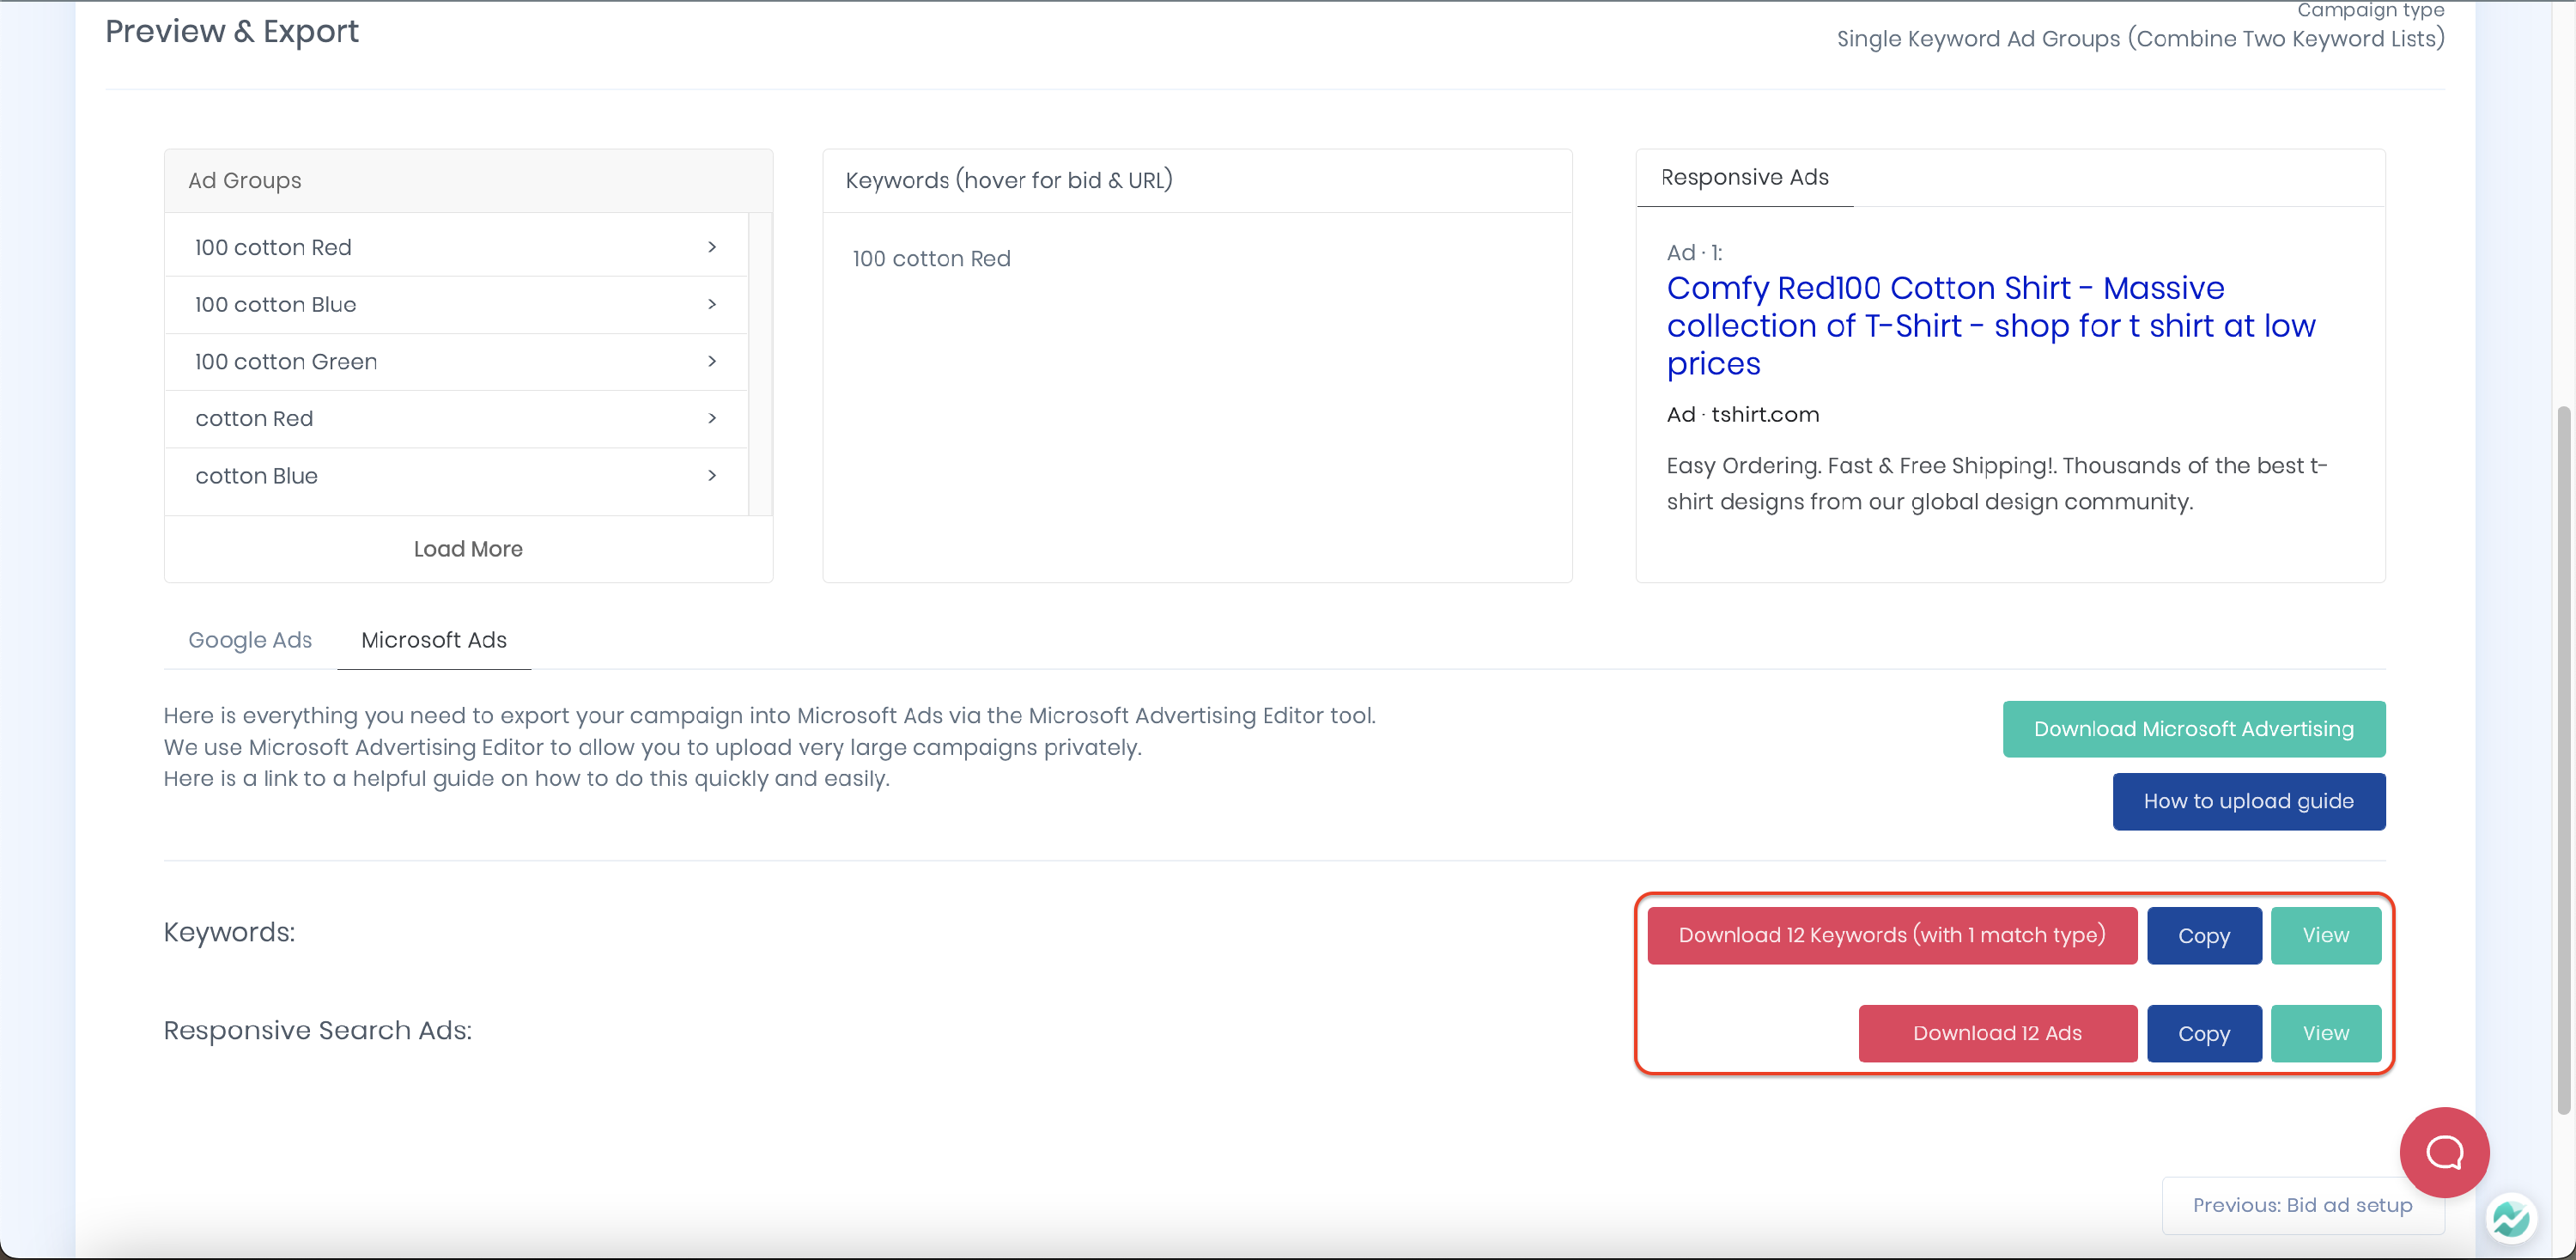
On the same page, you will have the option to Download your keywords and ad copy. You can start importing either with your keywords or ad copy. Open the downloaded file and copy all the details, including the header.
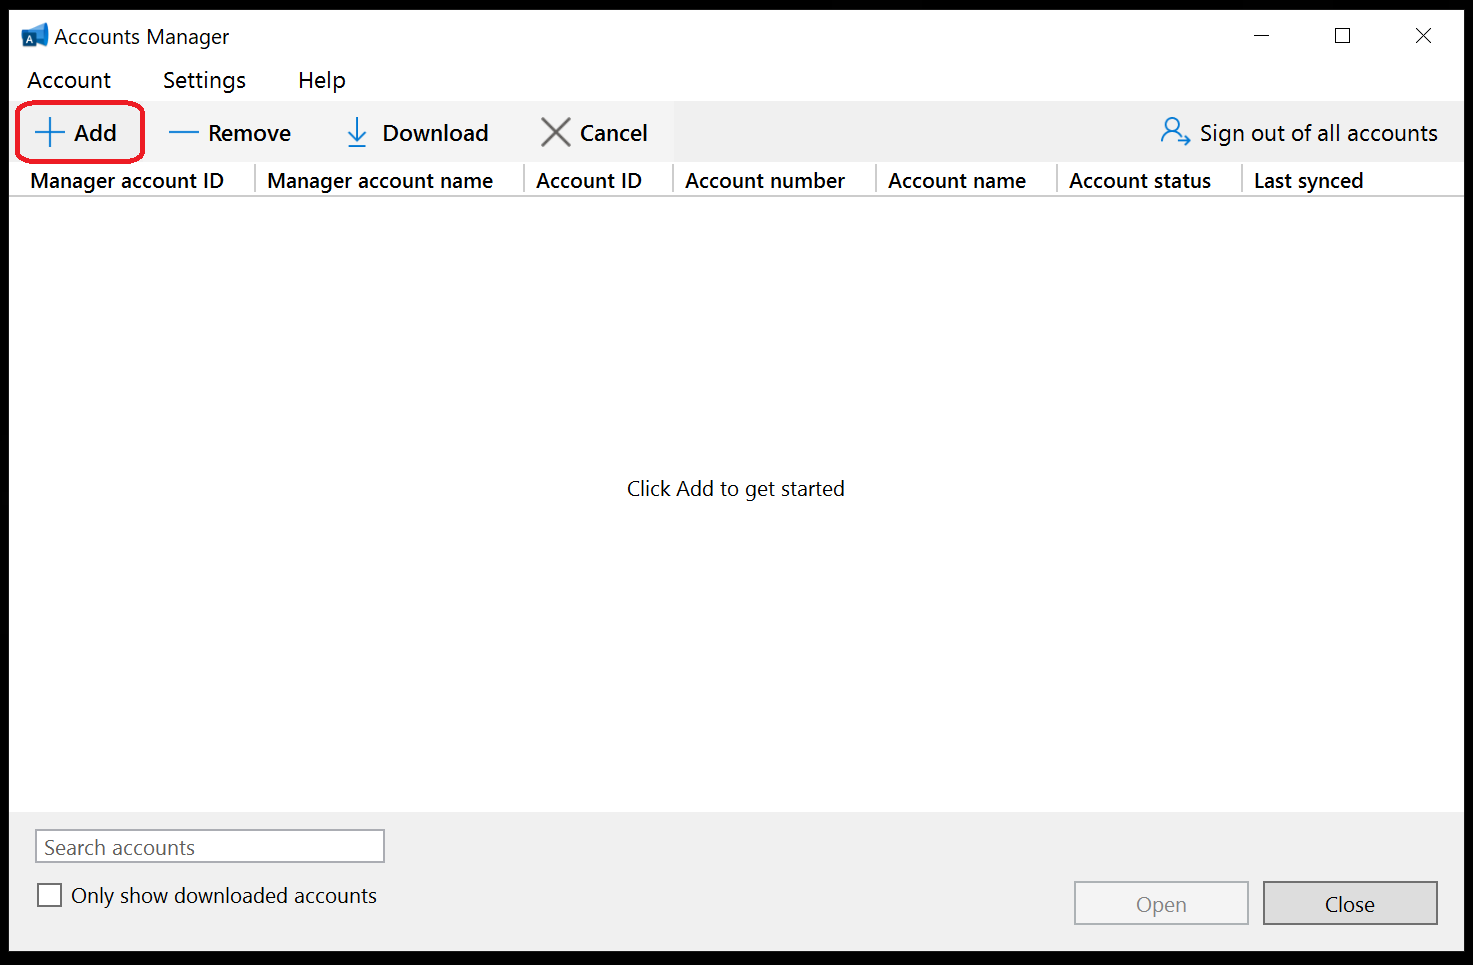
Open your account in Microsoft Advertising Editor by clicking the Add button. Next, sign in to your Microsoft Advertising Account and add the account you'd like to load in the Editor.
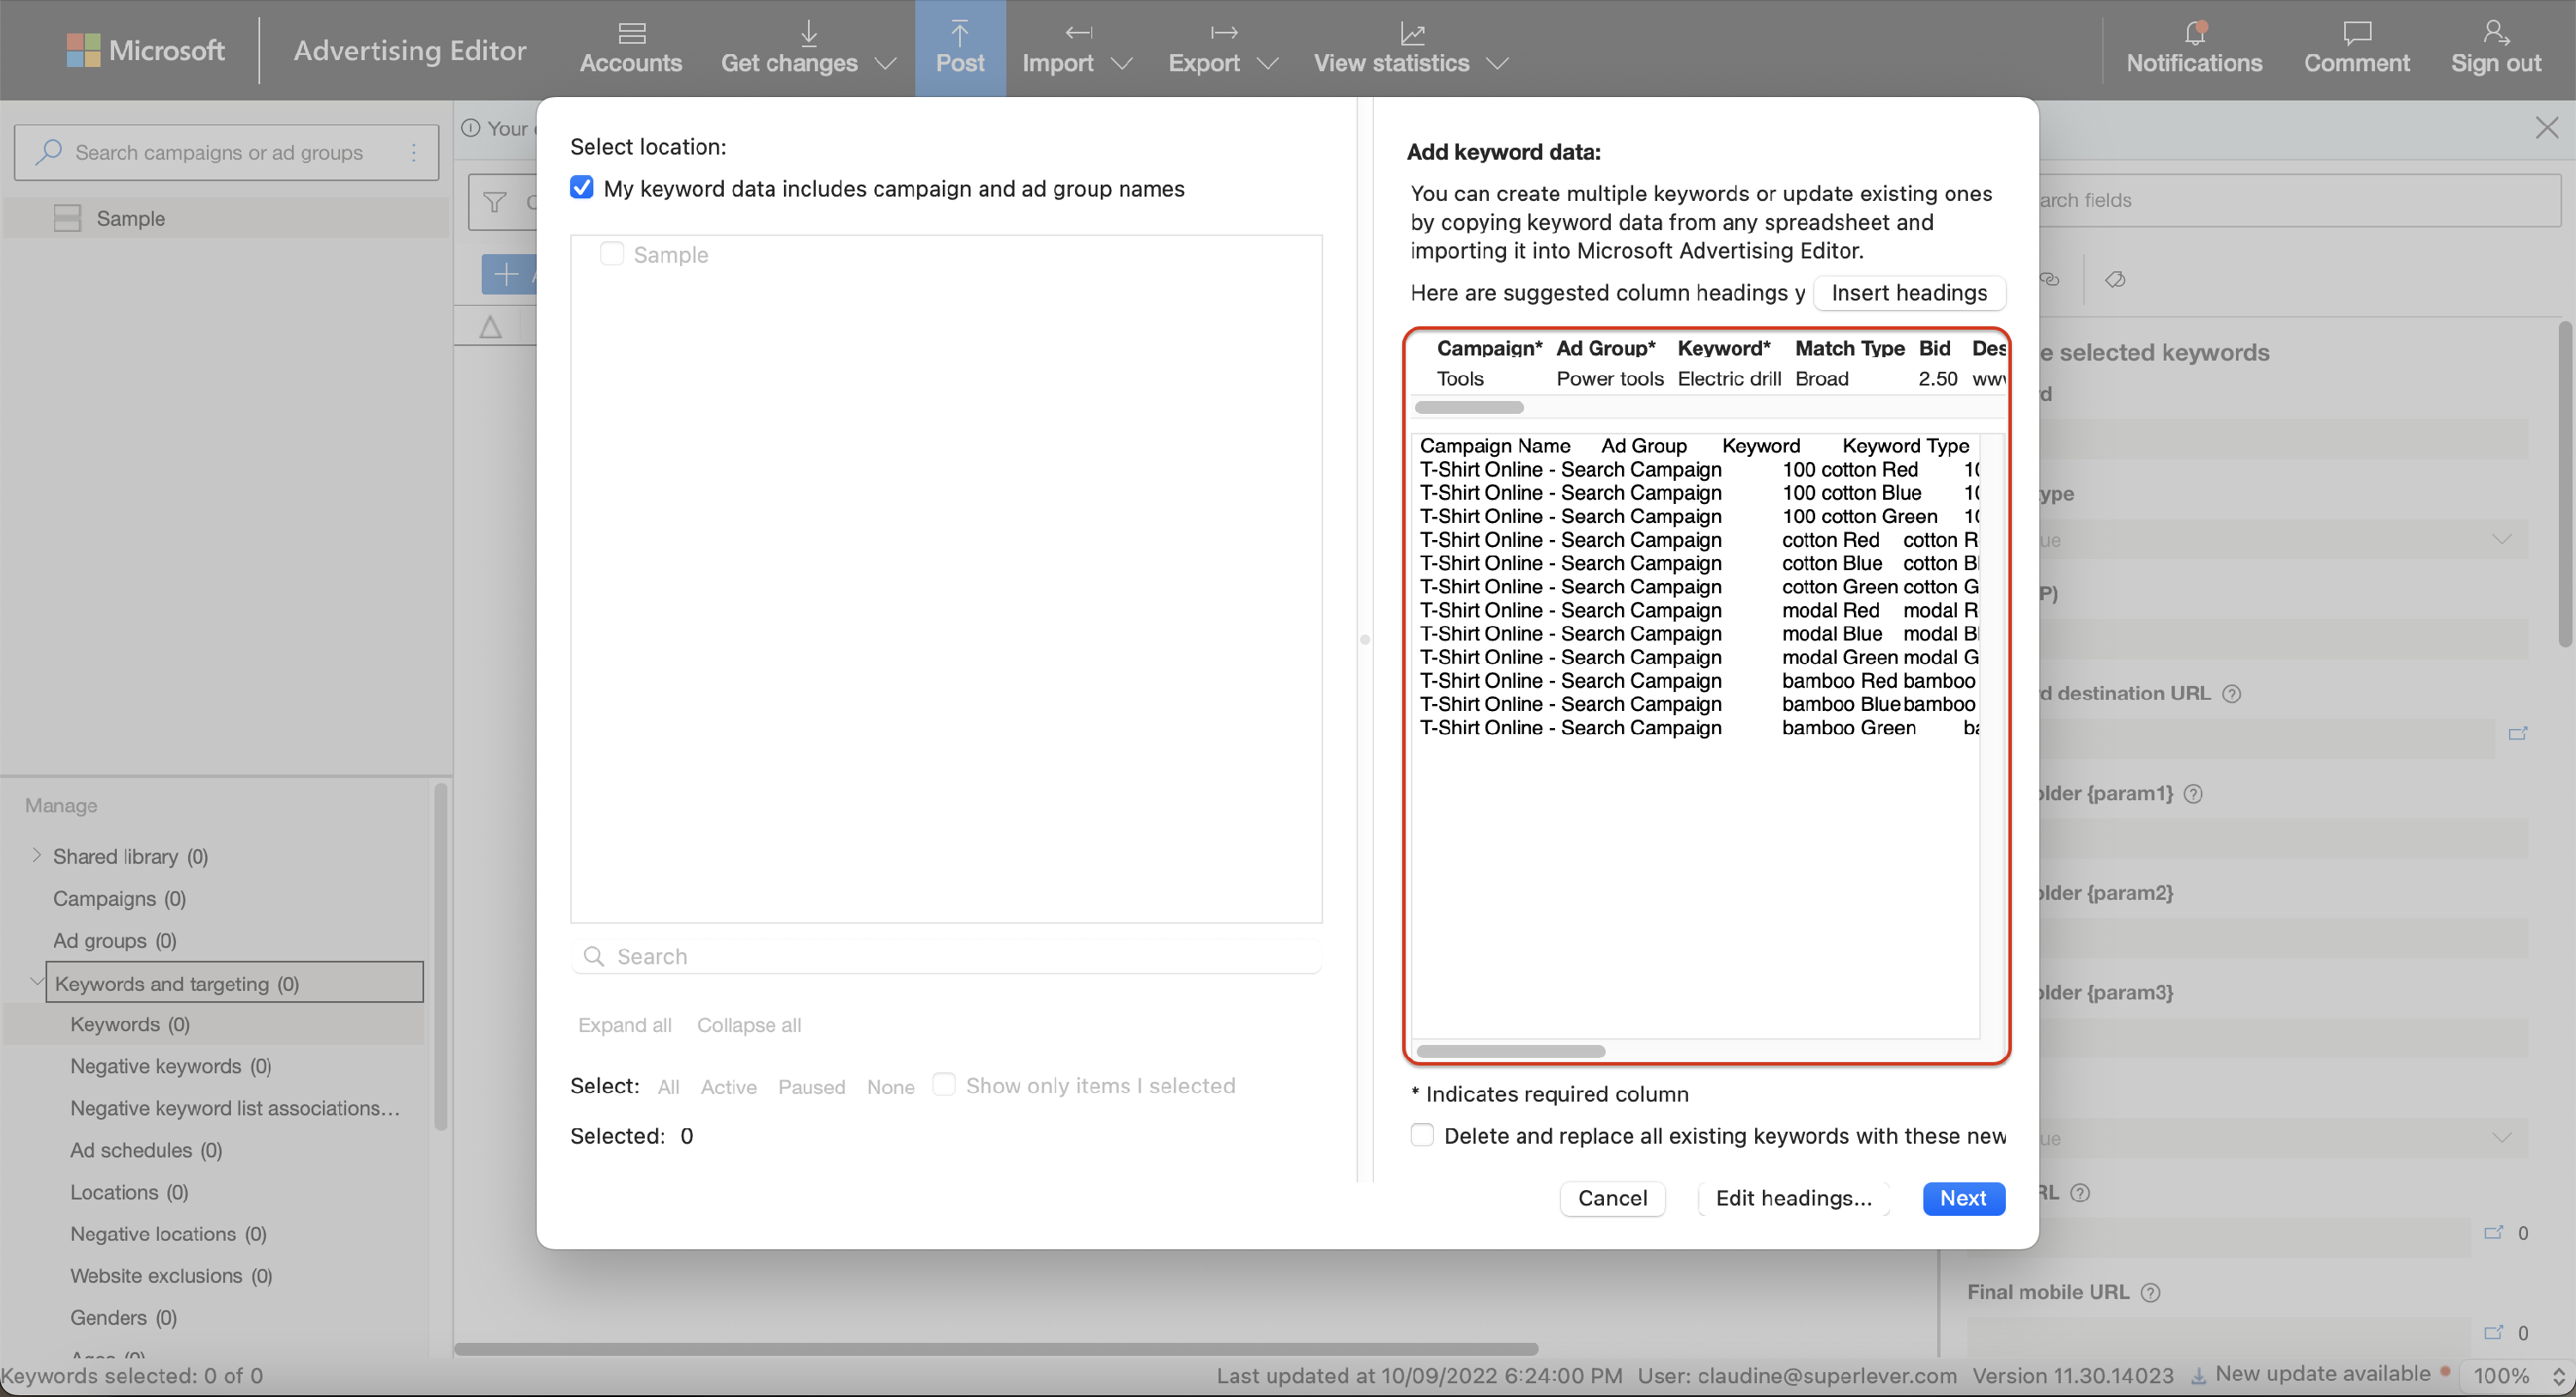
To download your keywords, click Keywords and target on the Type List section and select the Keywords tab. Then, on the Data View, click Make multiple changes, then choose Add/update multiple keywords.
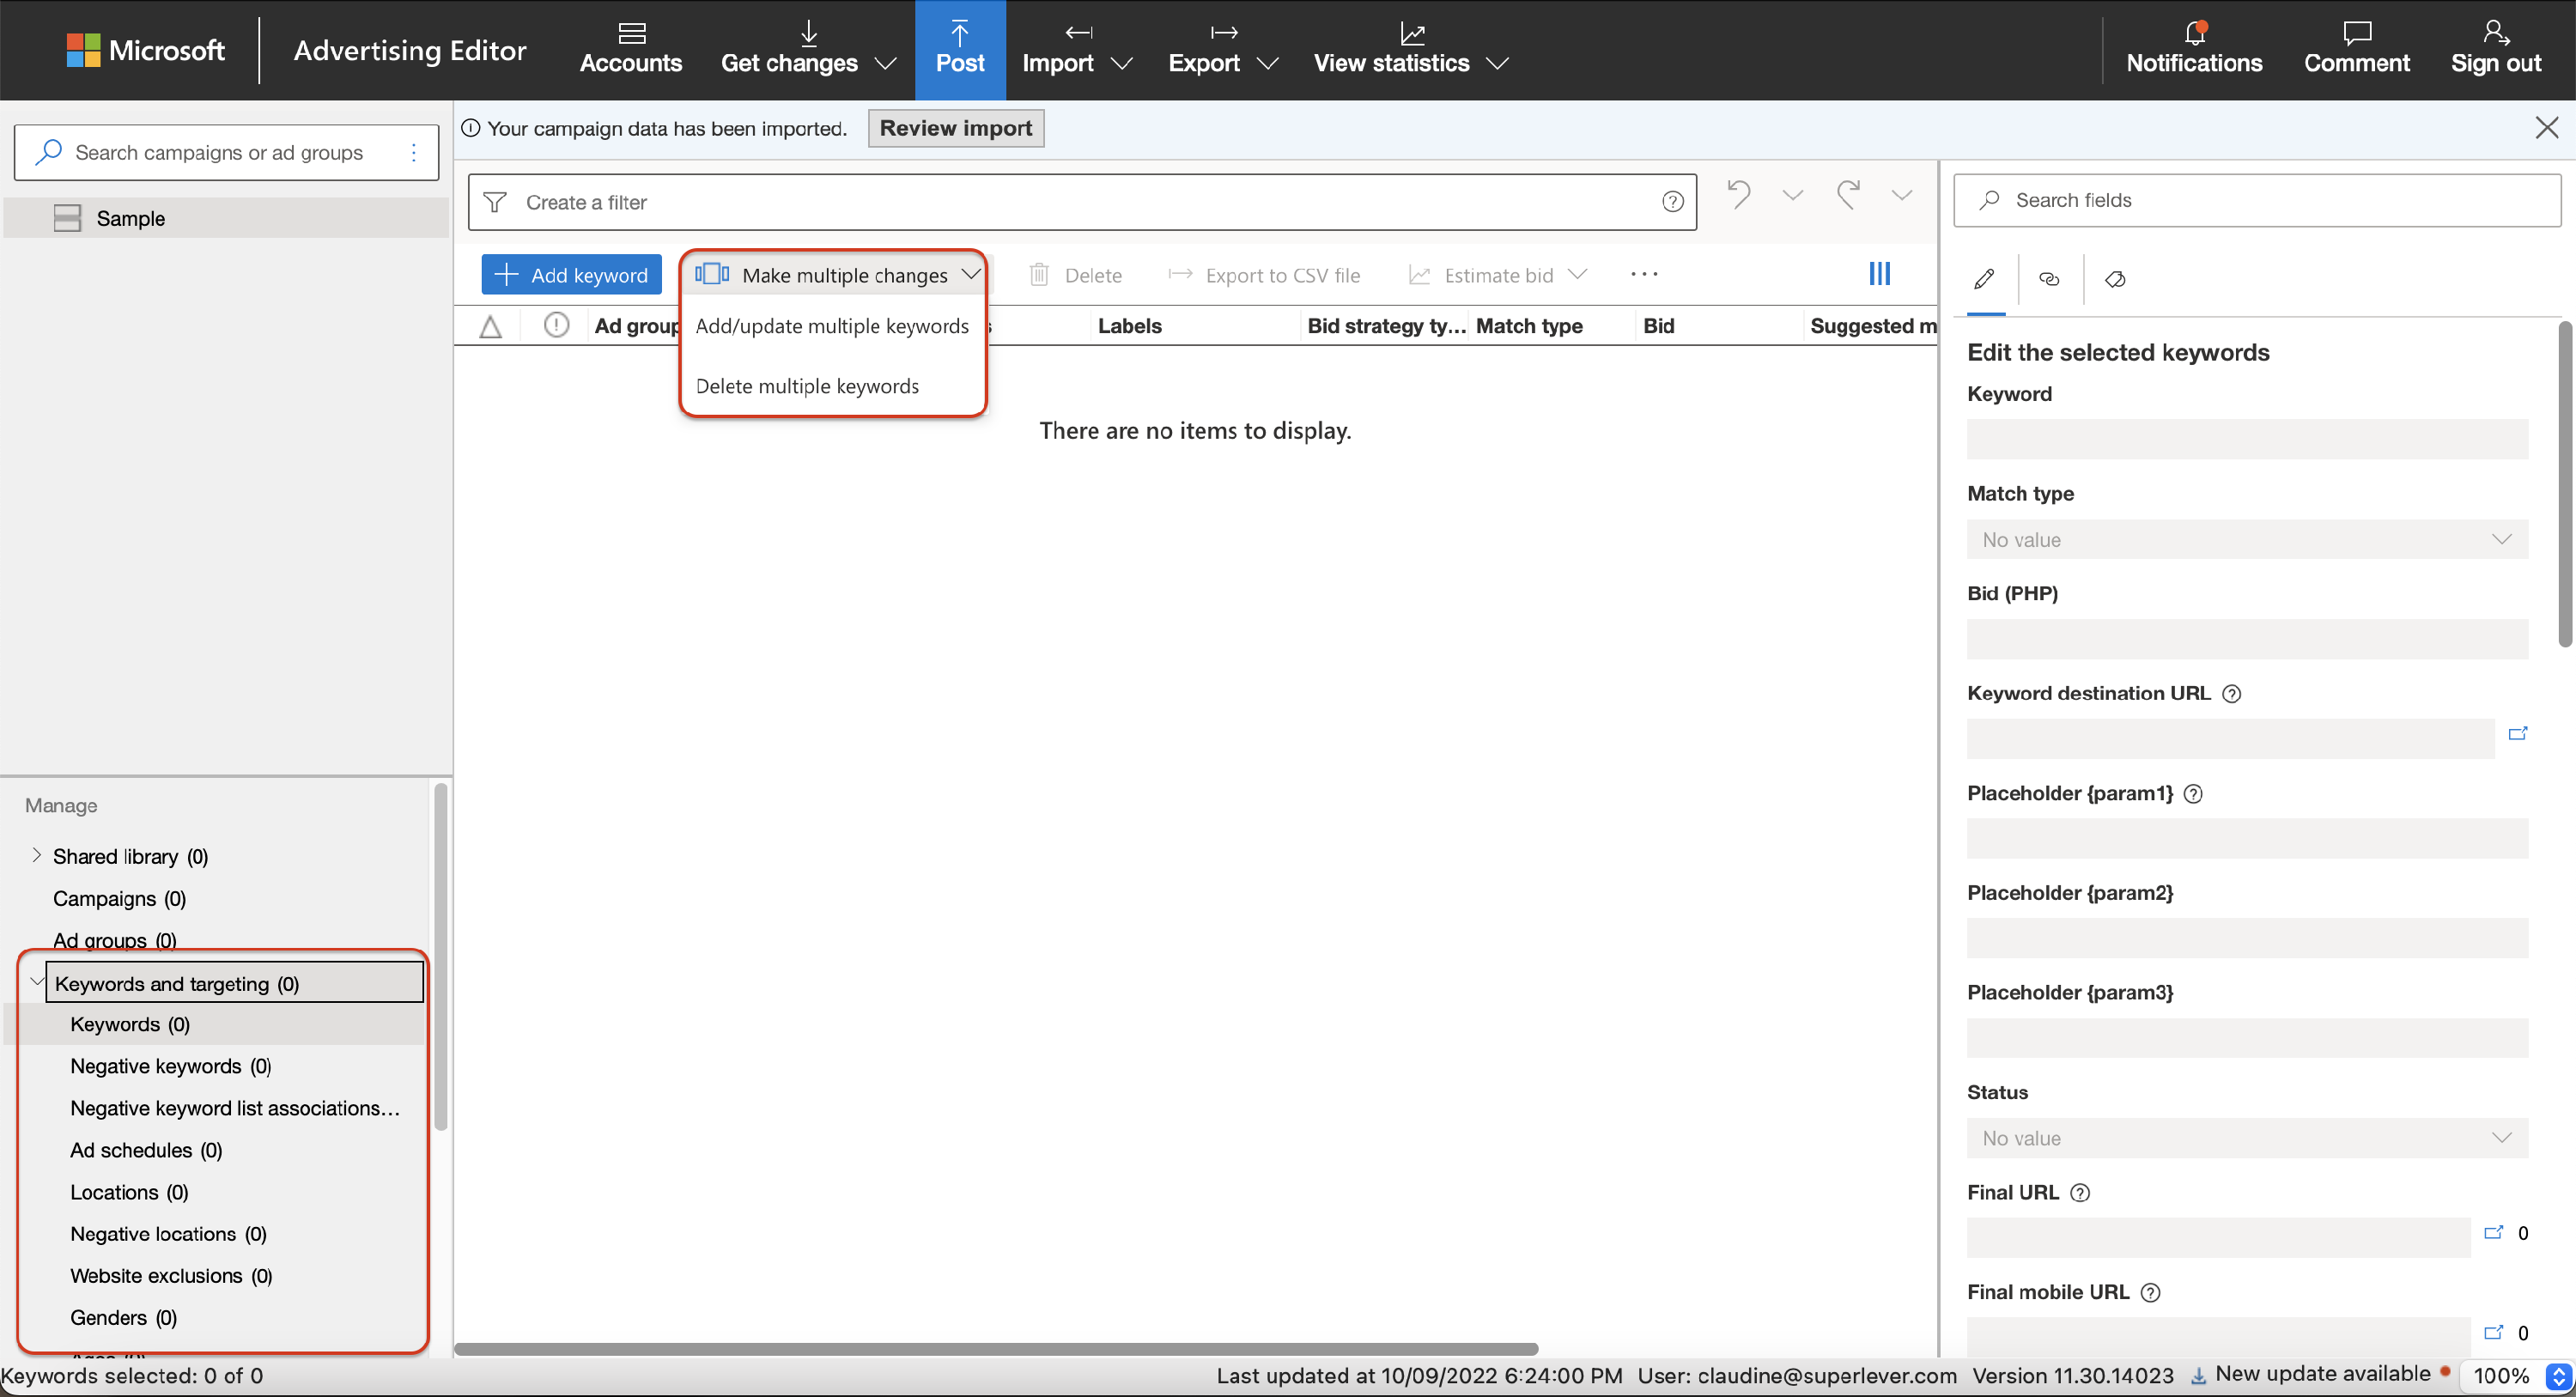
From here, you'll be able to paste your keyword details which you copied from your SpeedPPC file, then click Next.
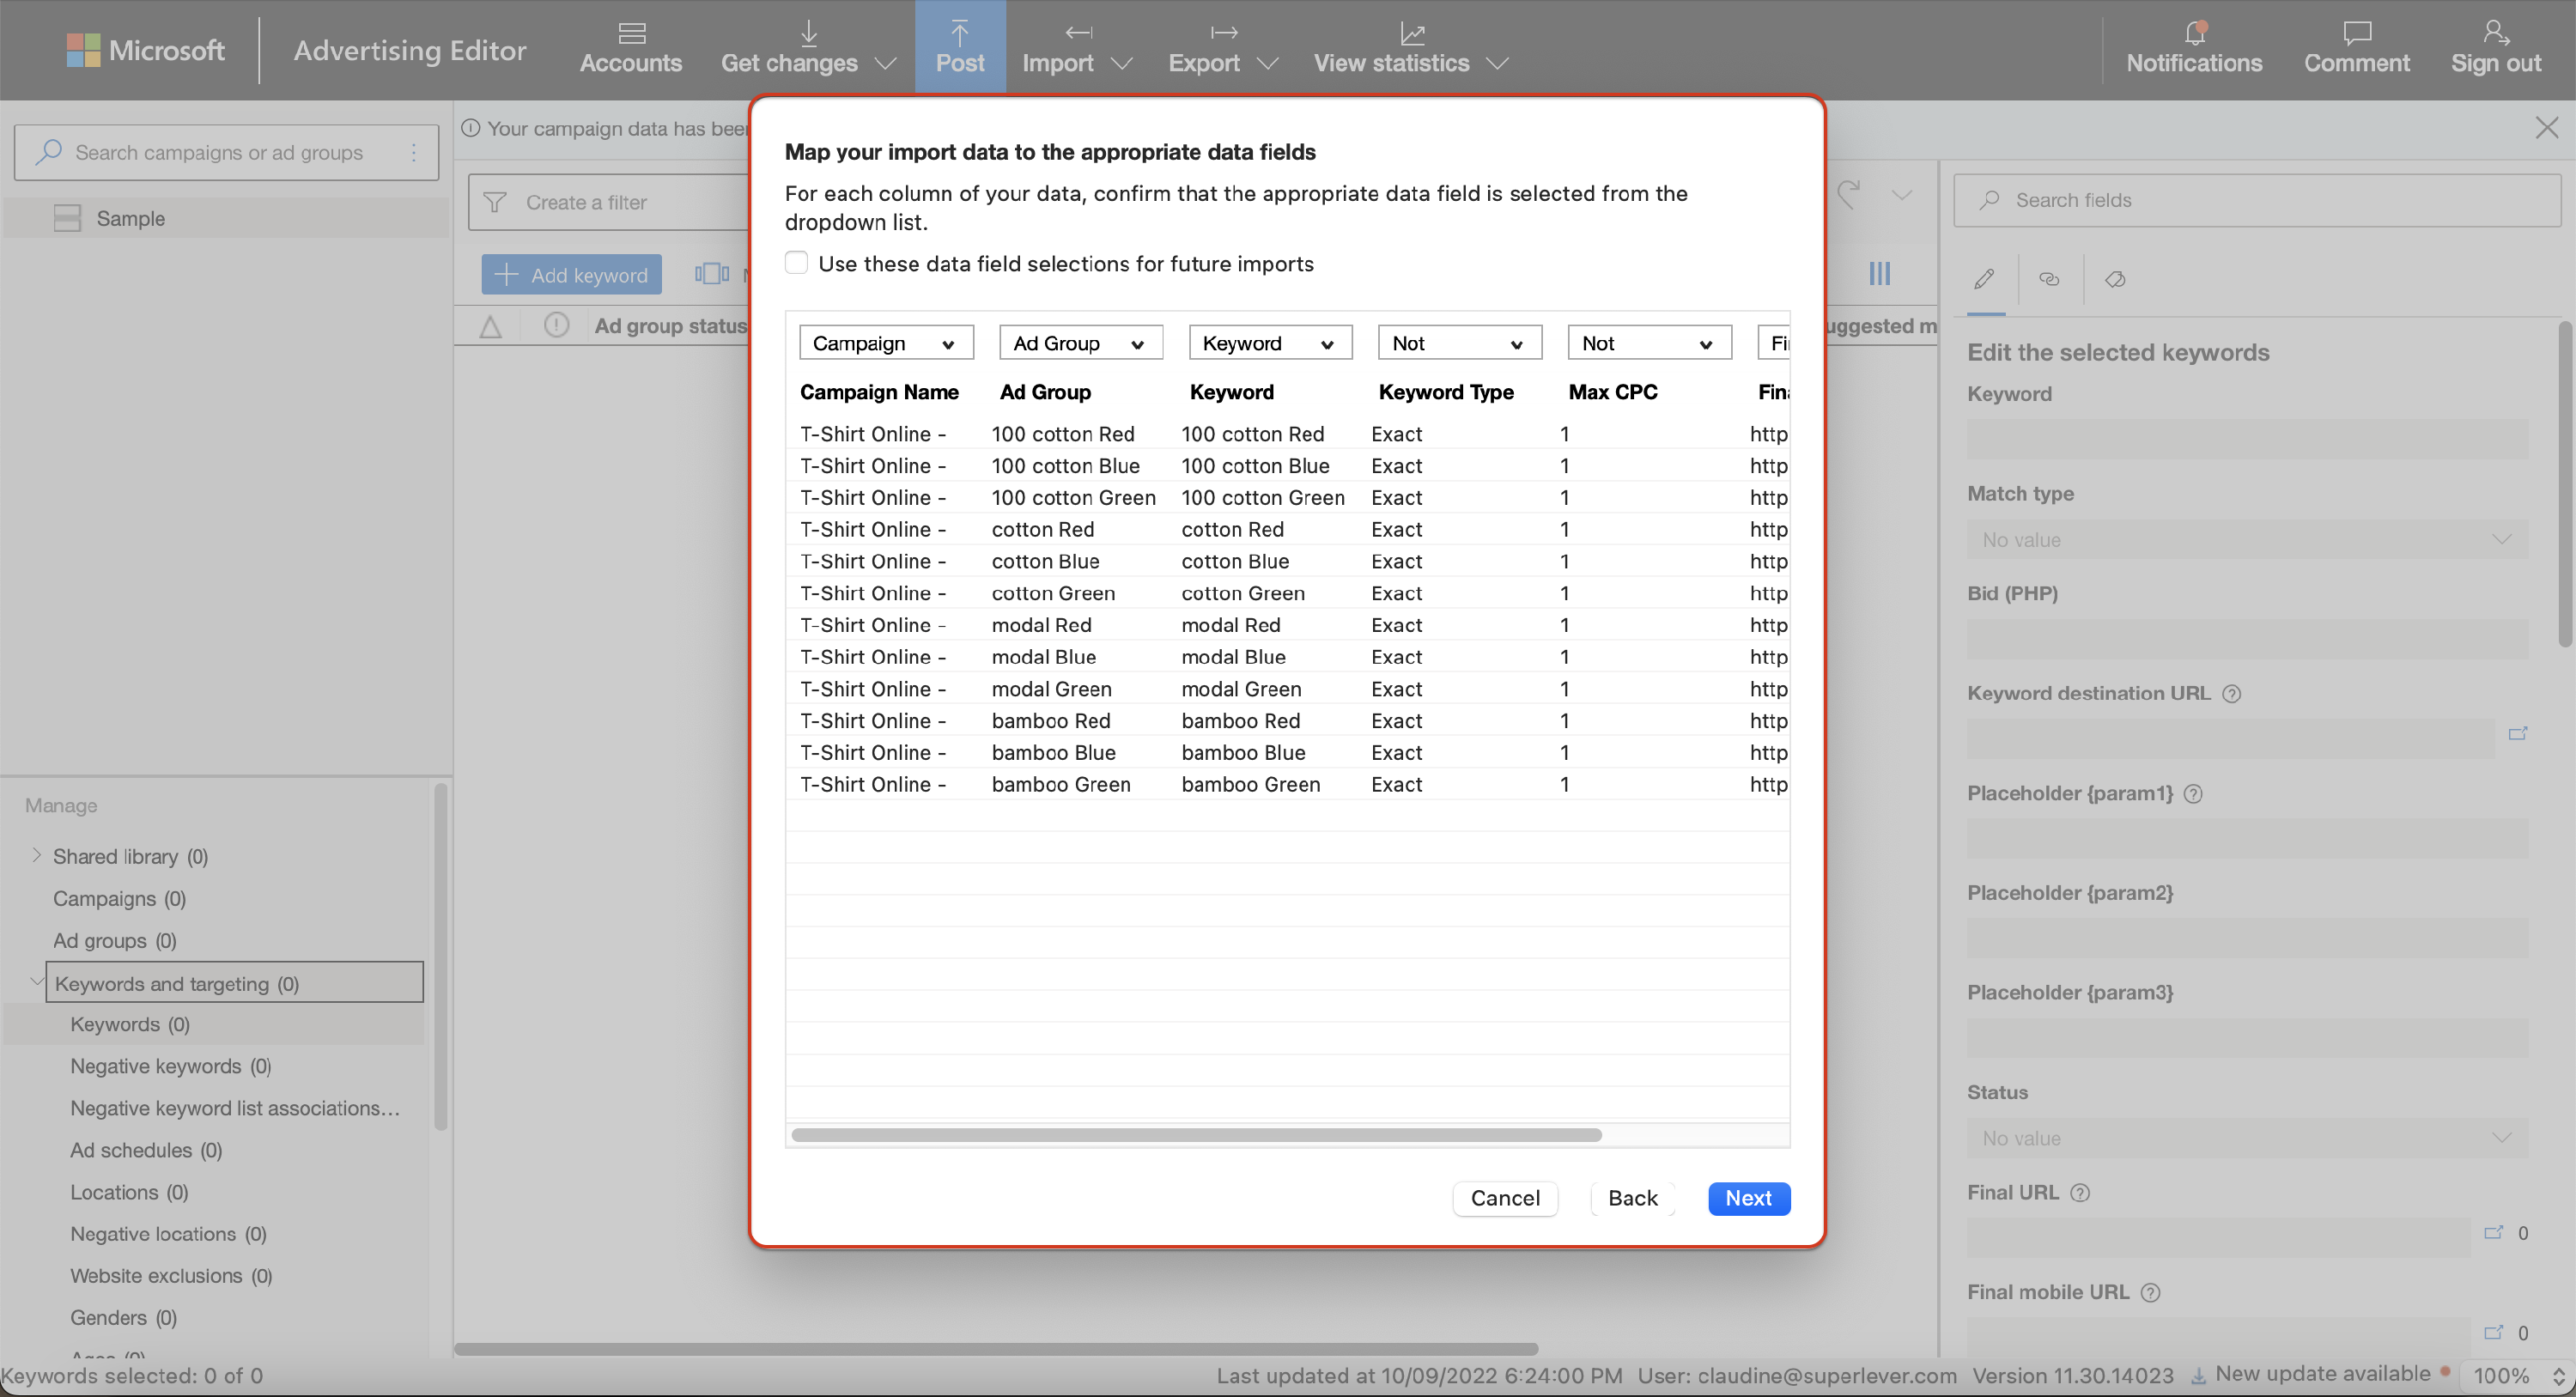
Next, check your headers and your keyword details before proceeding.
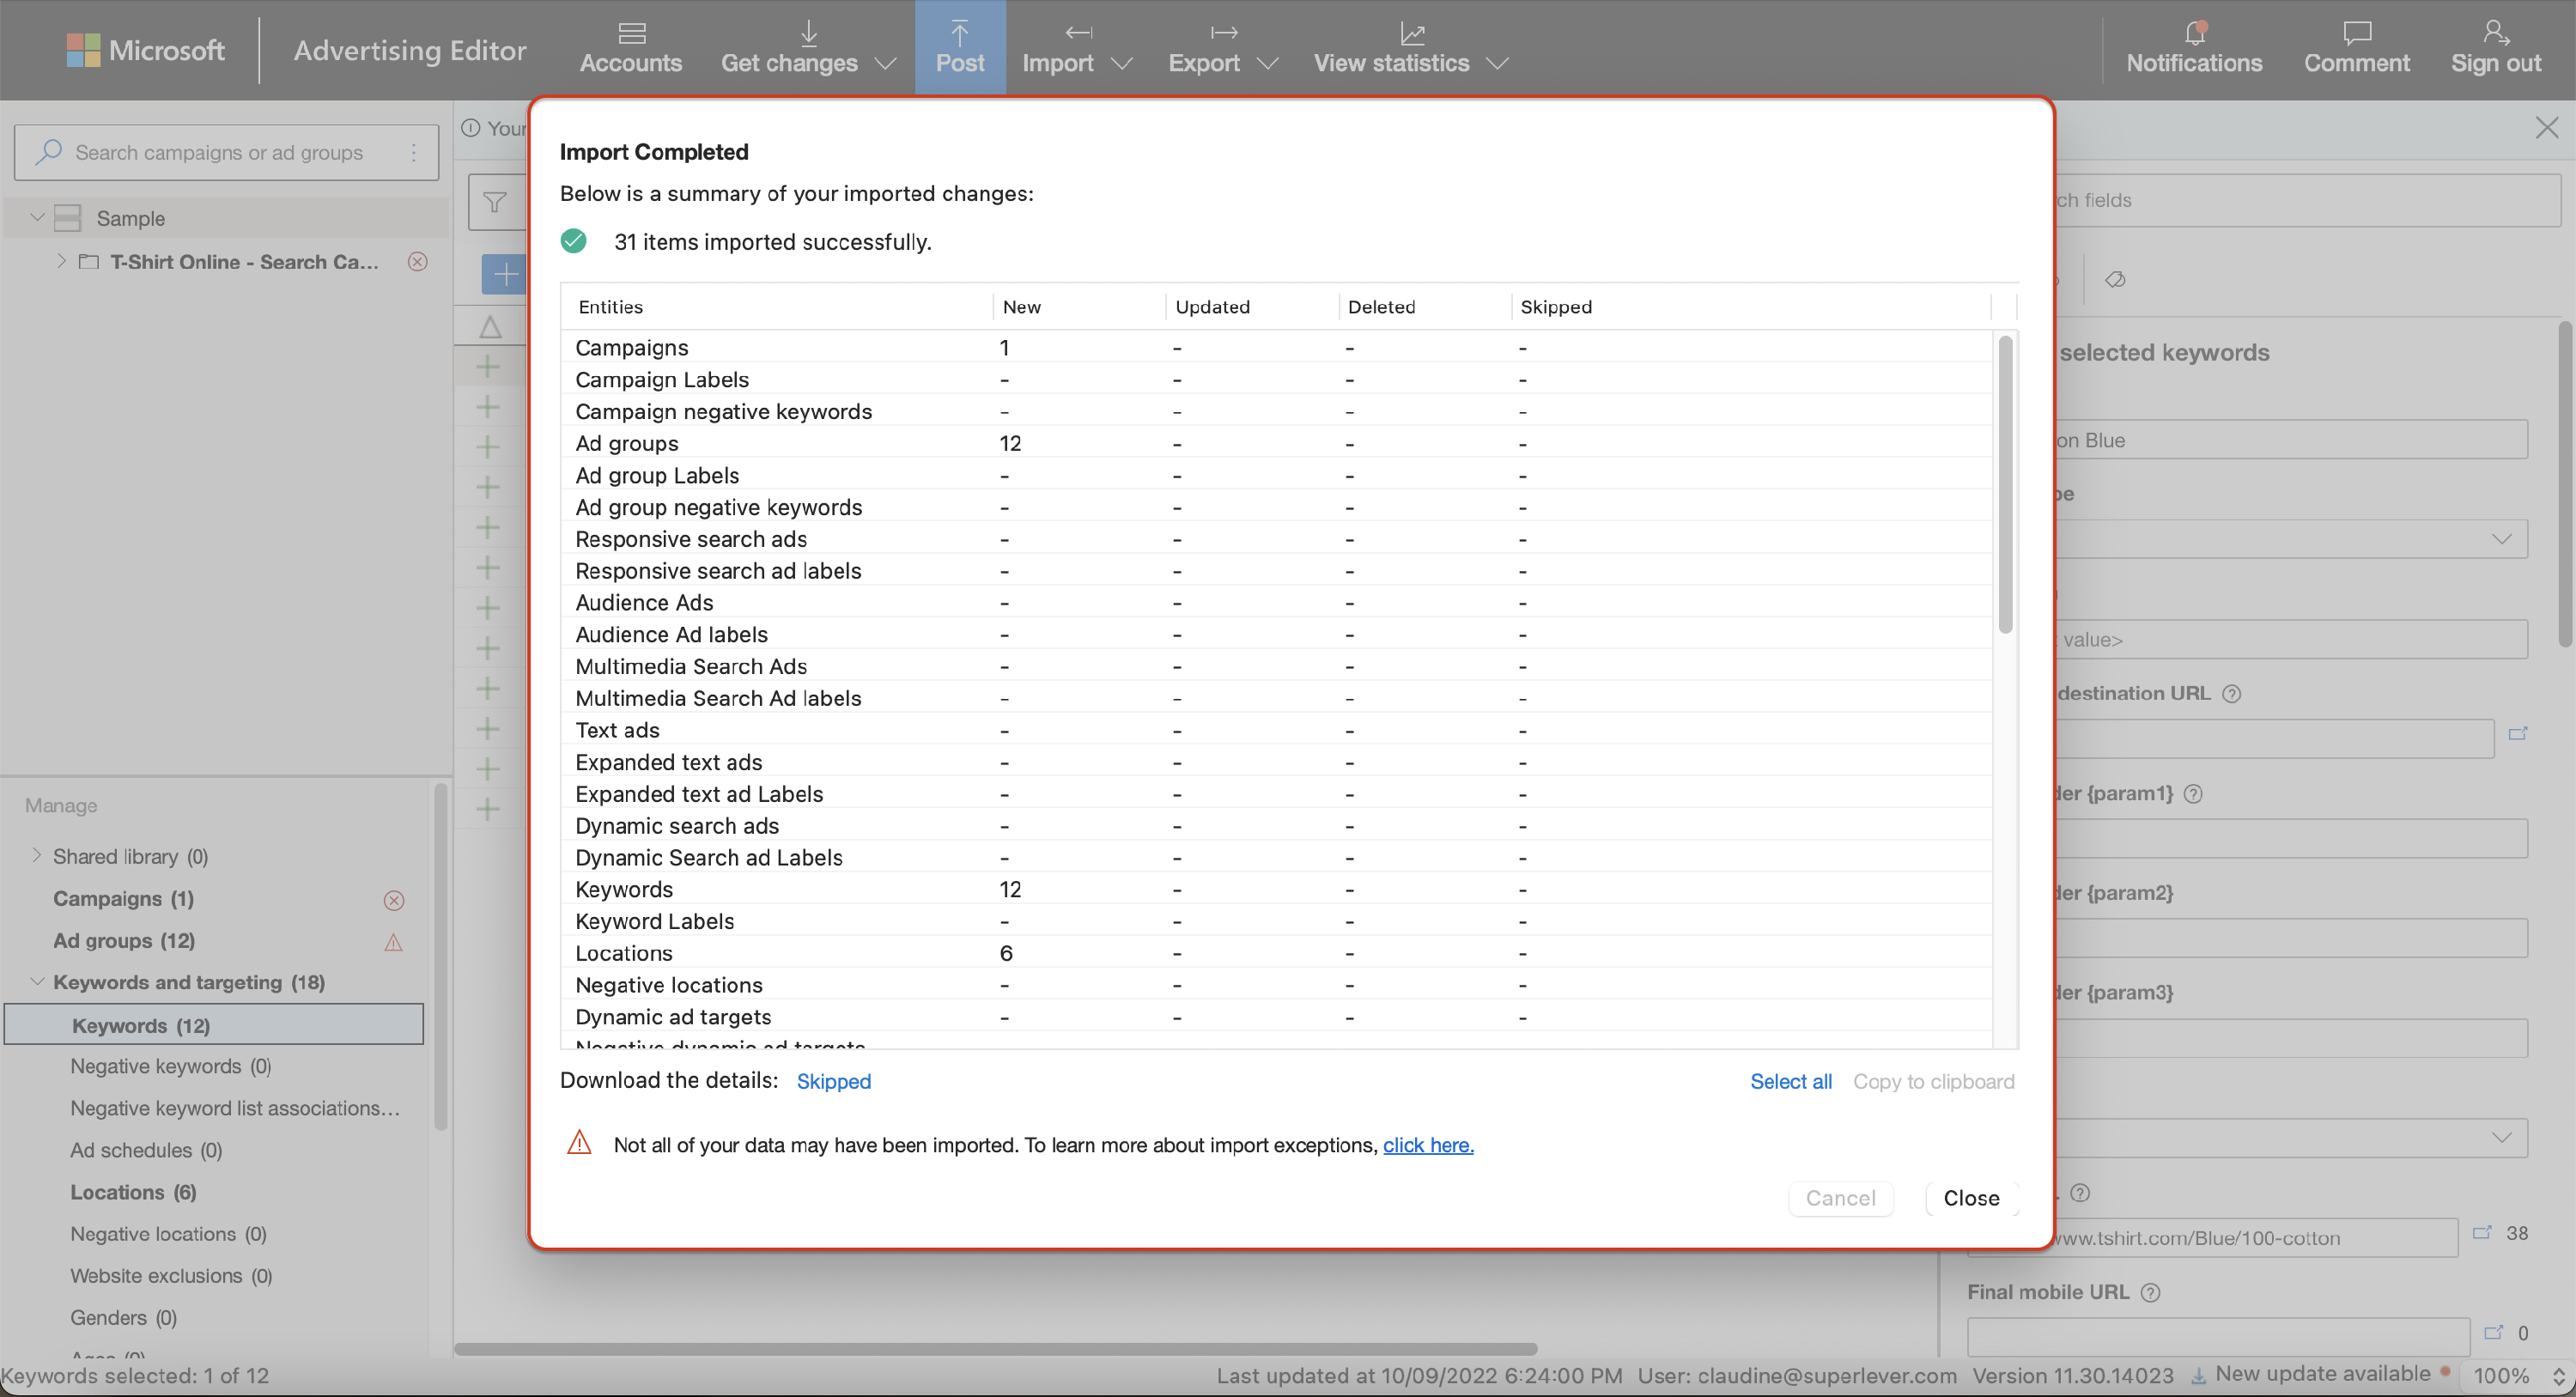
After that, it will show the status of the imported campaign details. It'sIt's best to review what has been imported and what has been skipped.
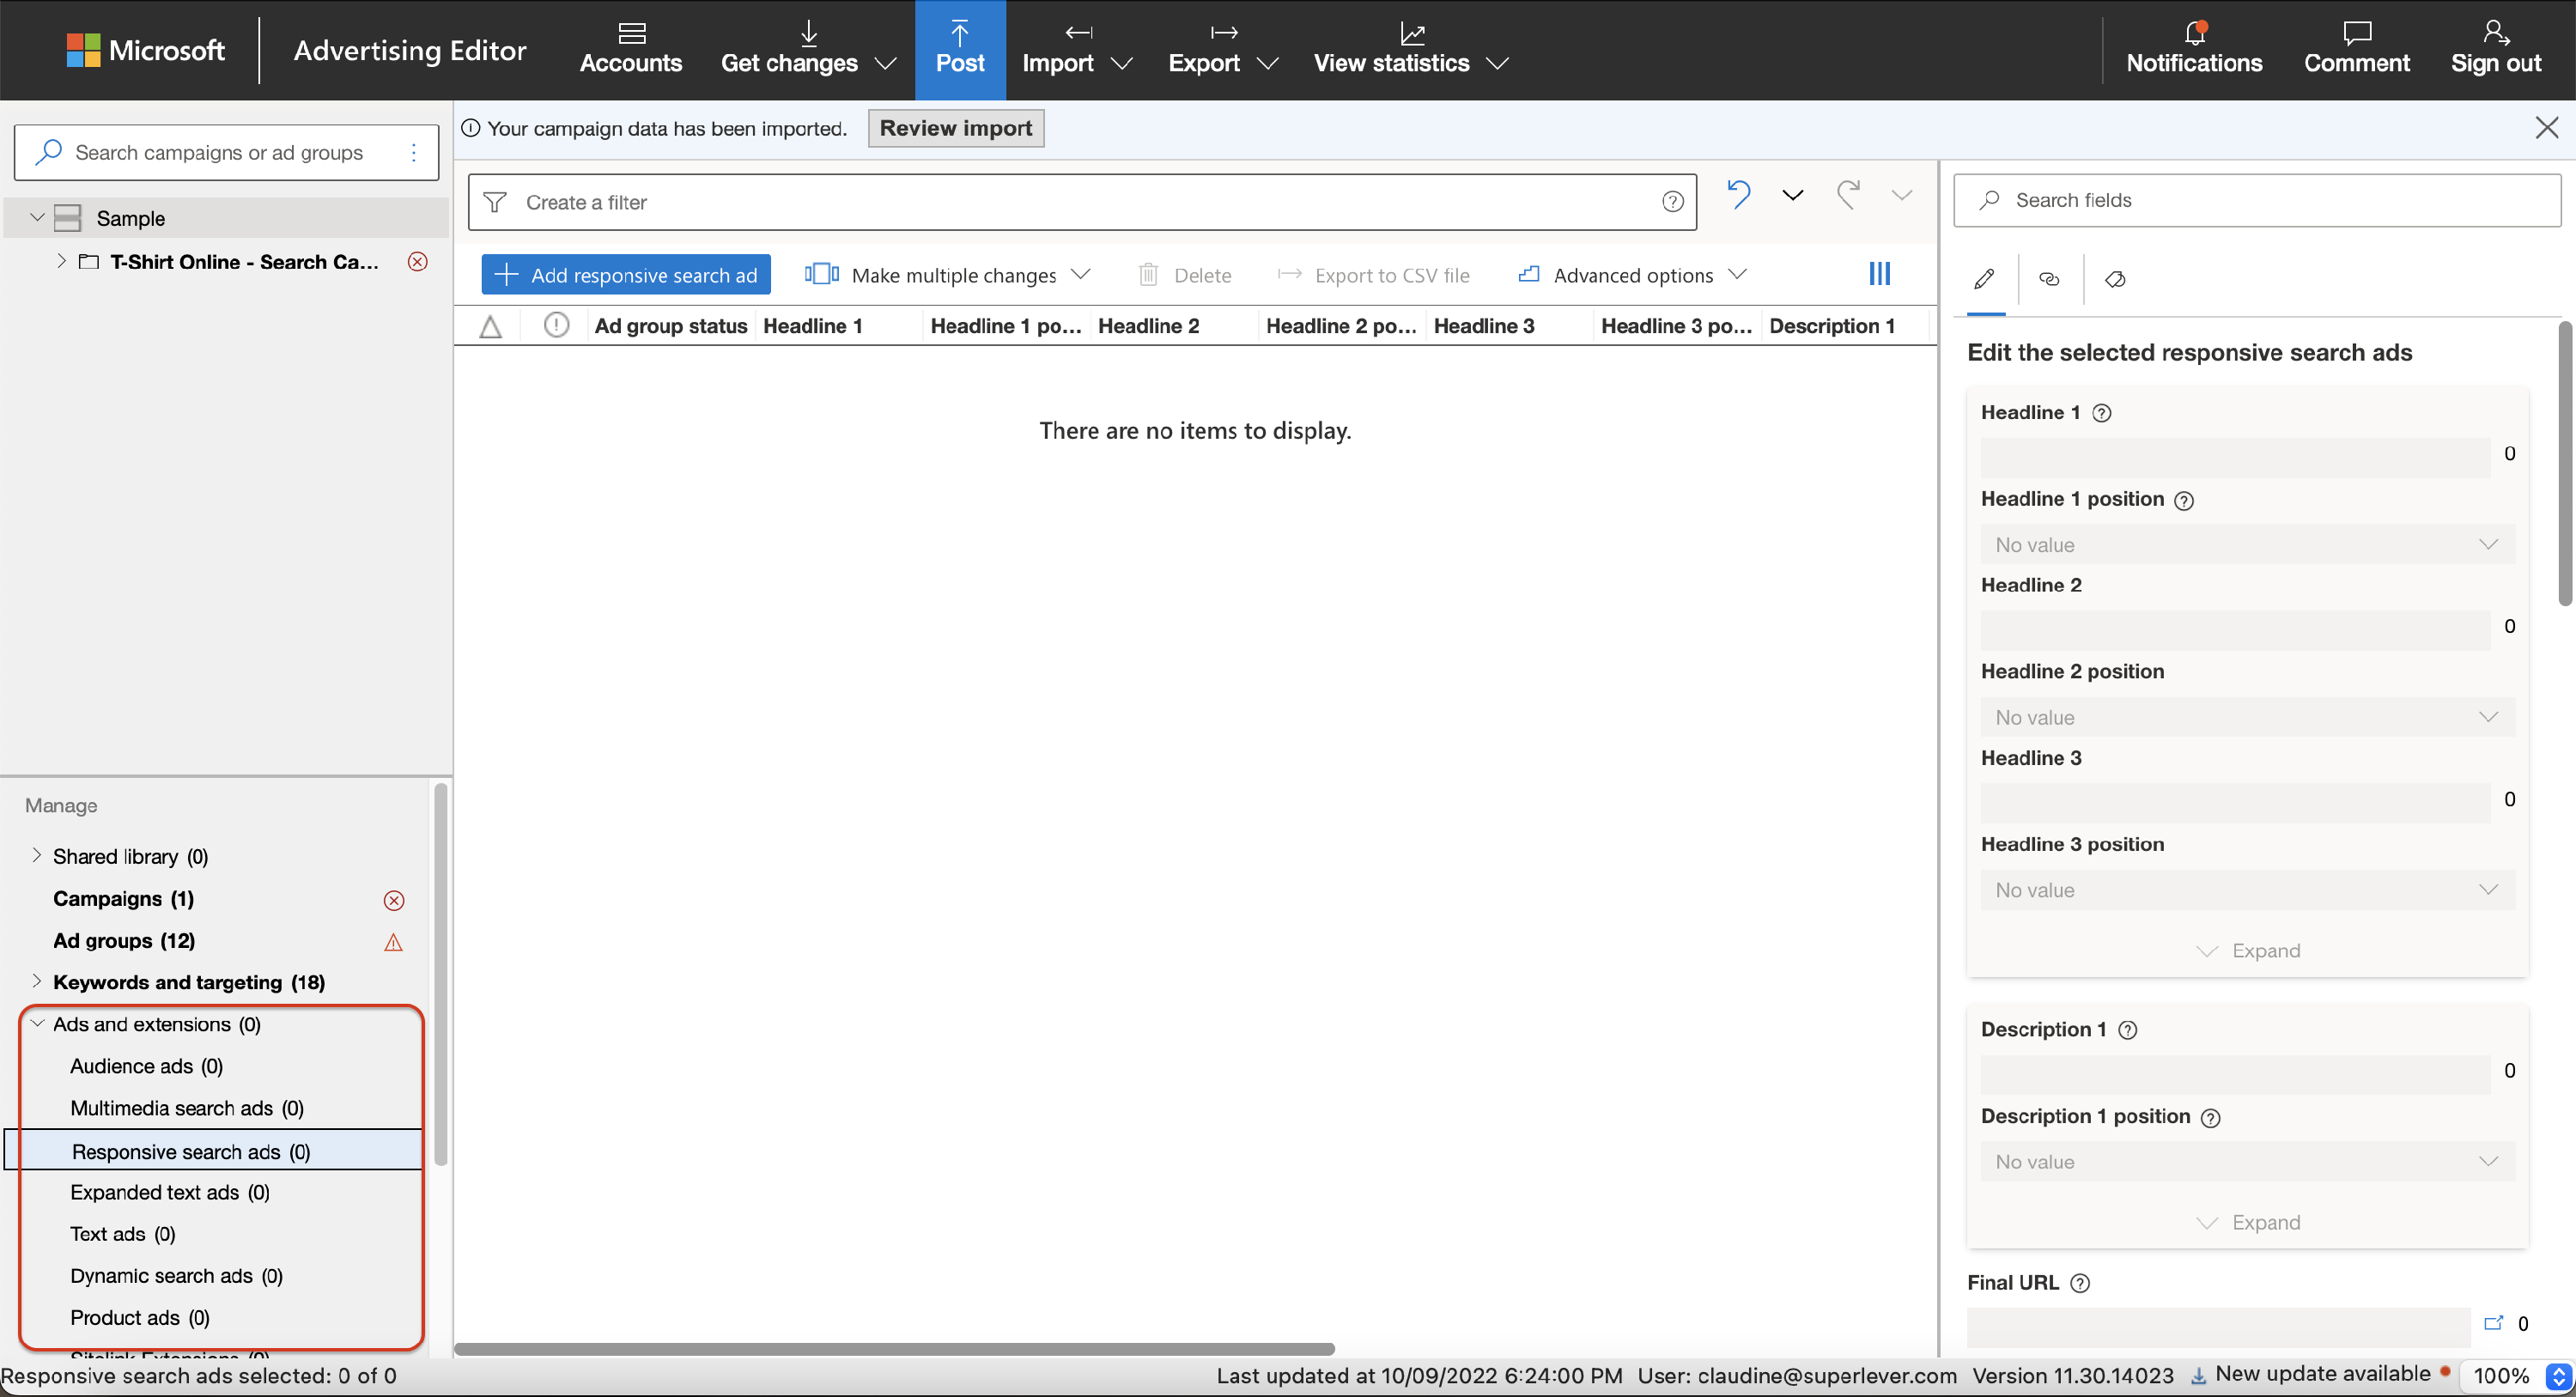
You can follow the same steps to add your ad copy. You can start by clicking the Ads and Ad Extensions on the Type List section, then click Responsive Search Ads.
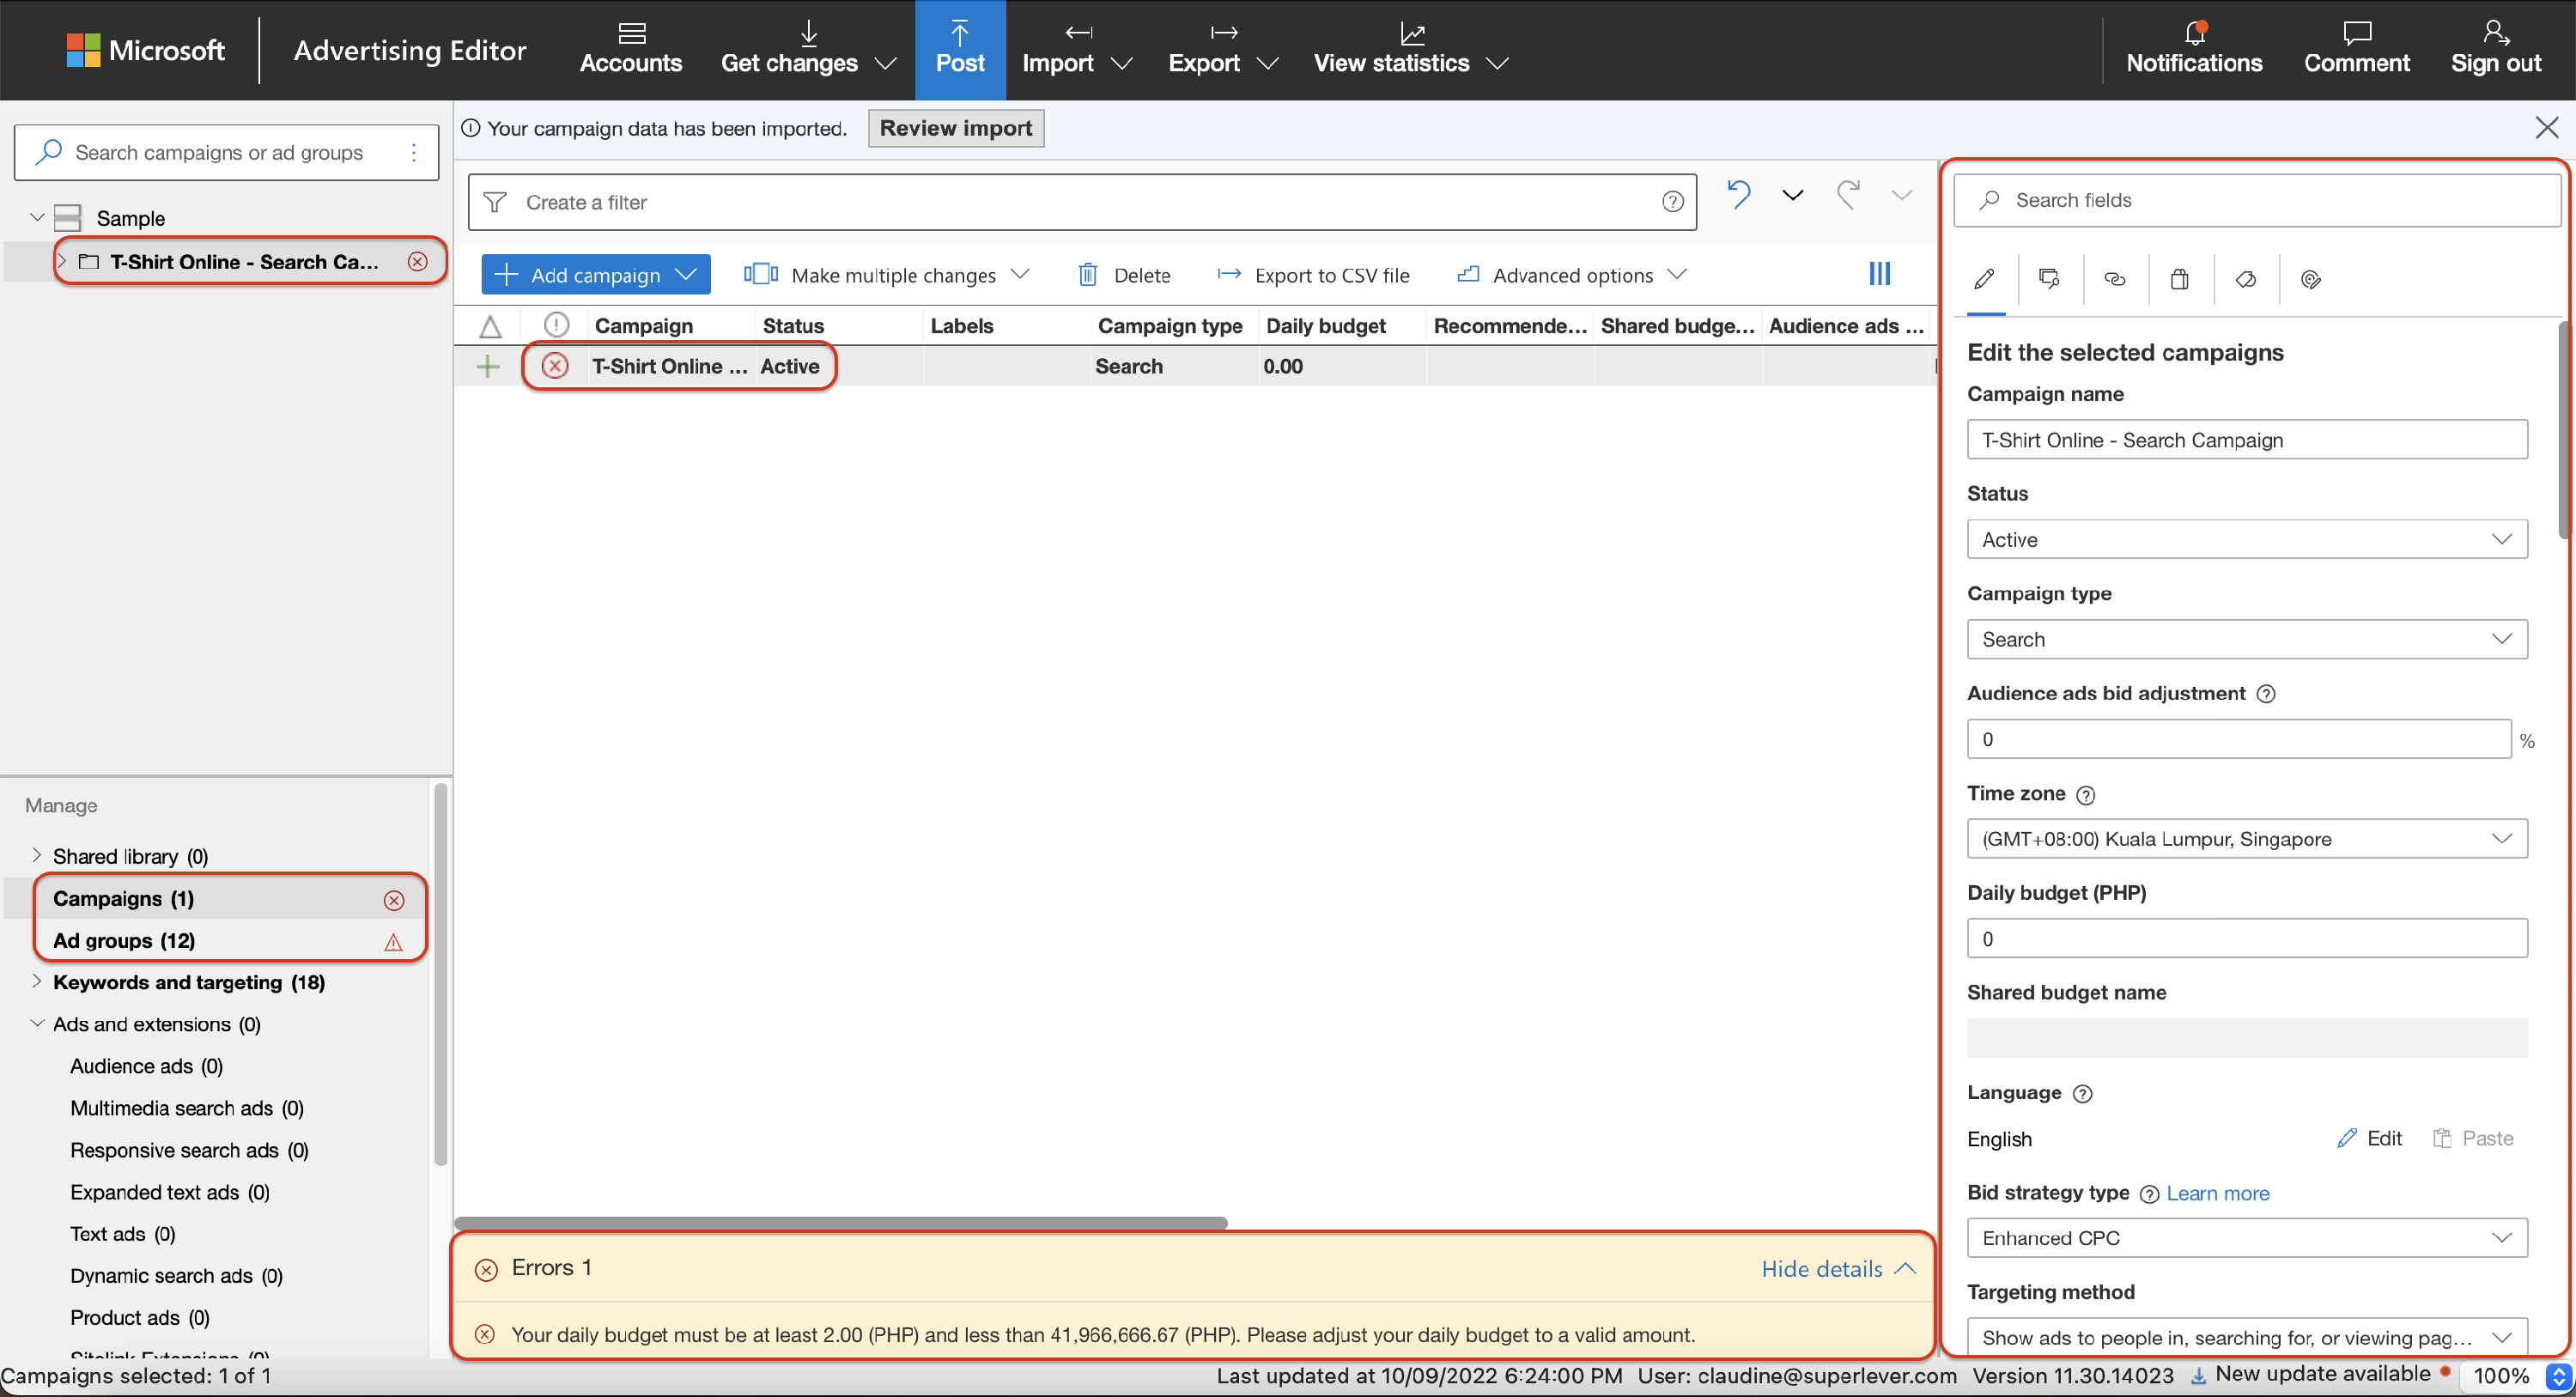
After adding your keywords and/or ad copy, notice that your campaign and ad groups are automatically created. To complete the import process, address the alerts showing on your Editor. You can check this by clicking the tabs with either the x marks or exclamation points.
The Editor will also provide the complete Error details. Usually, errors are due to missing details. Use the Vertical Pane to add your Daily Budget and CPC (Cost-Per-Click). You can also add other details included in the same section.
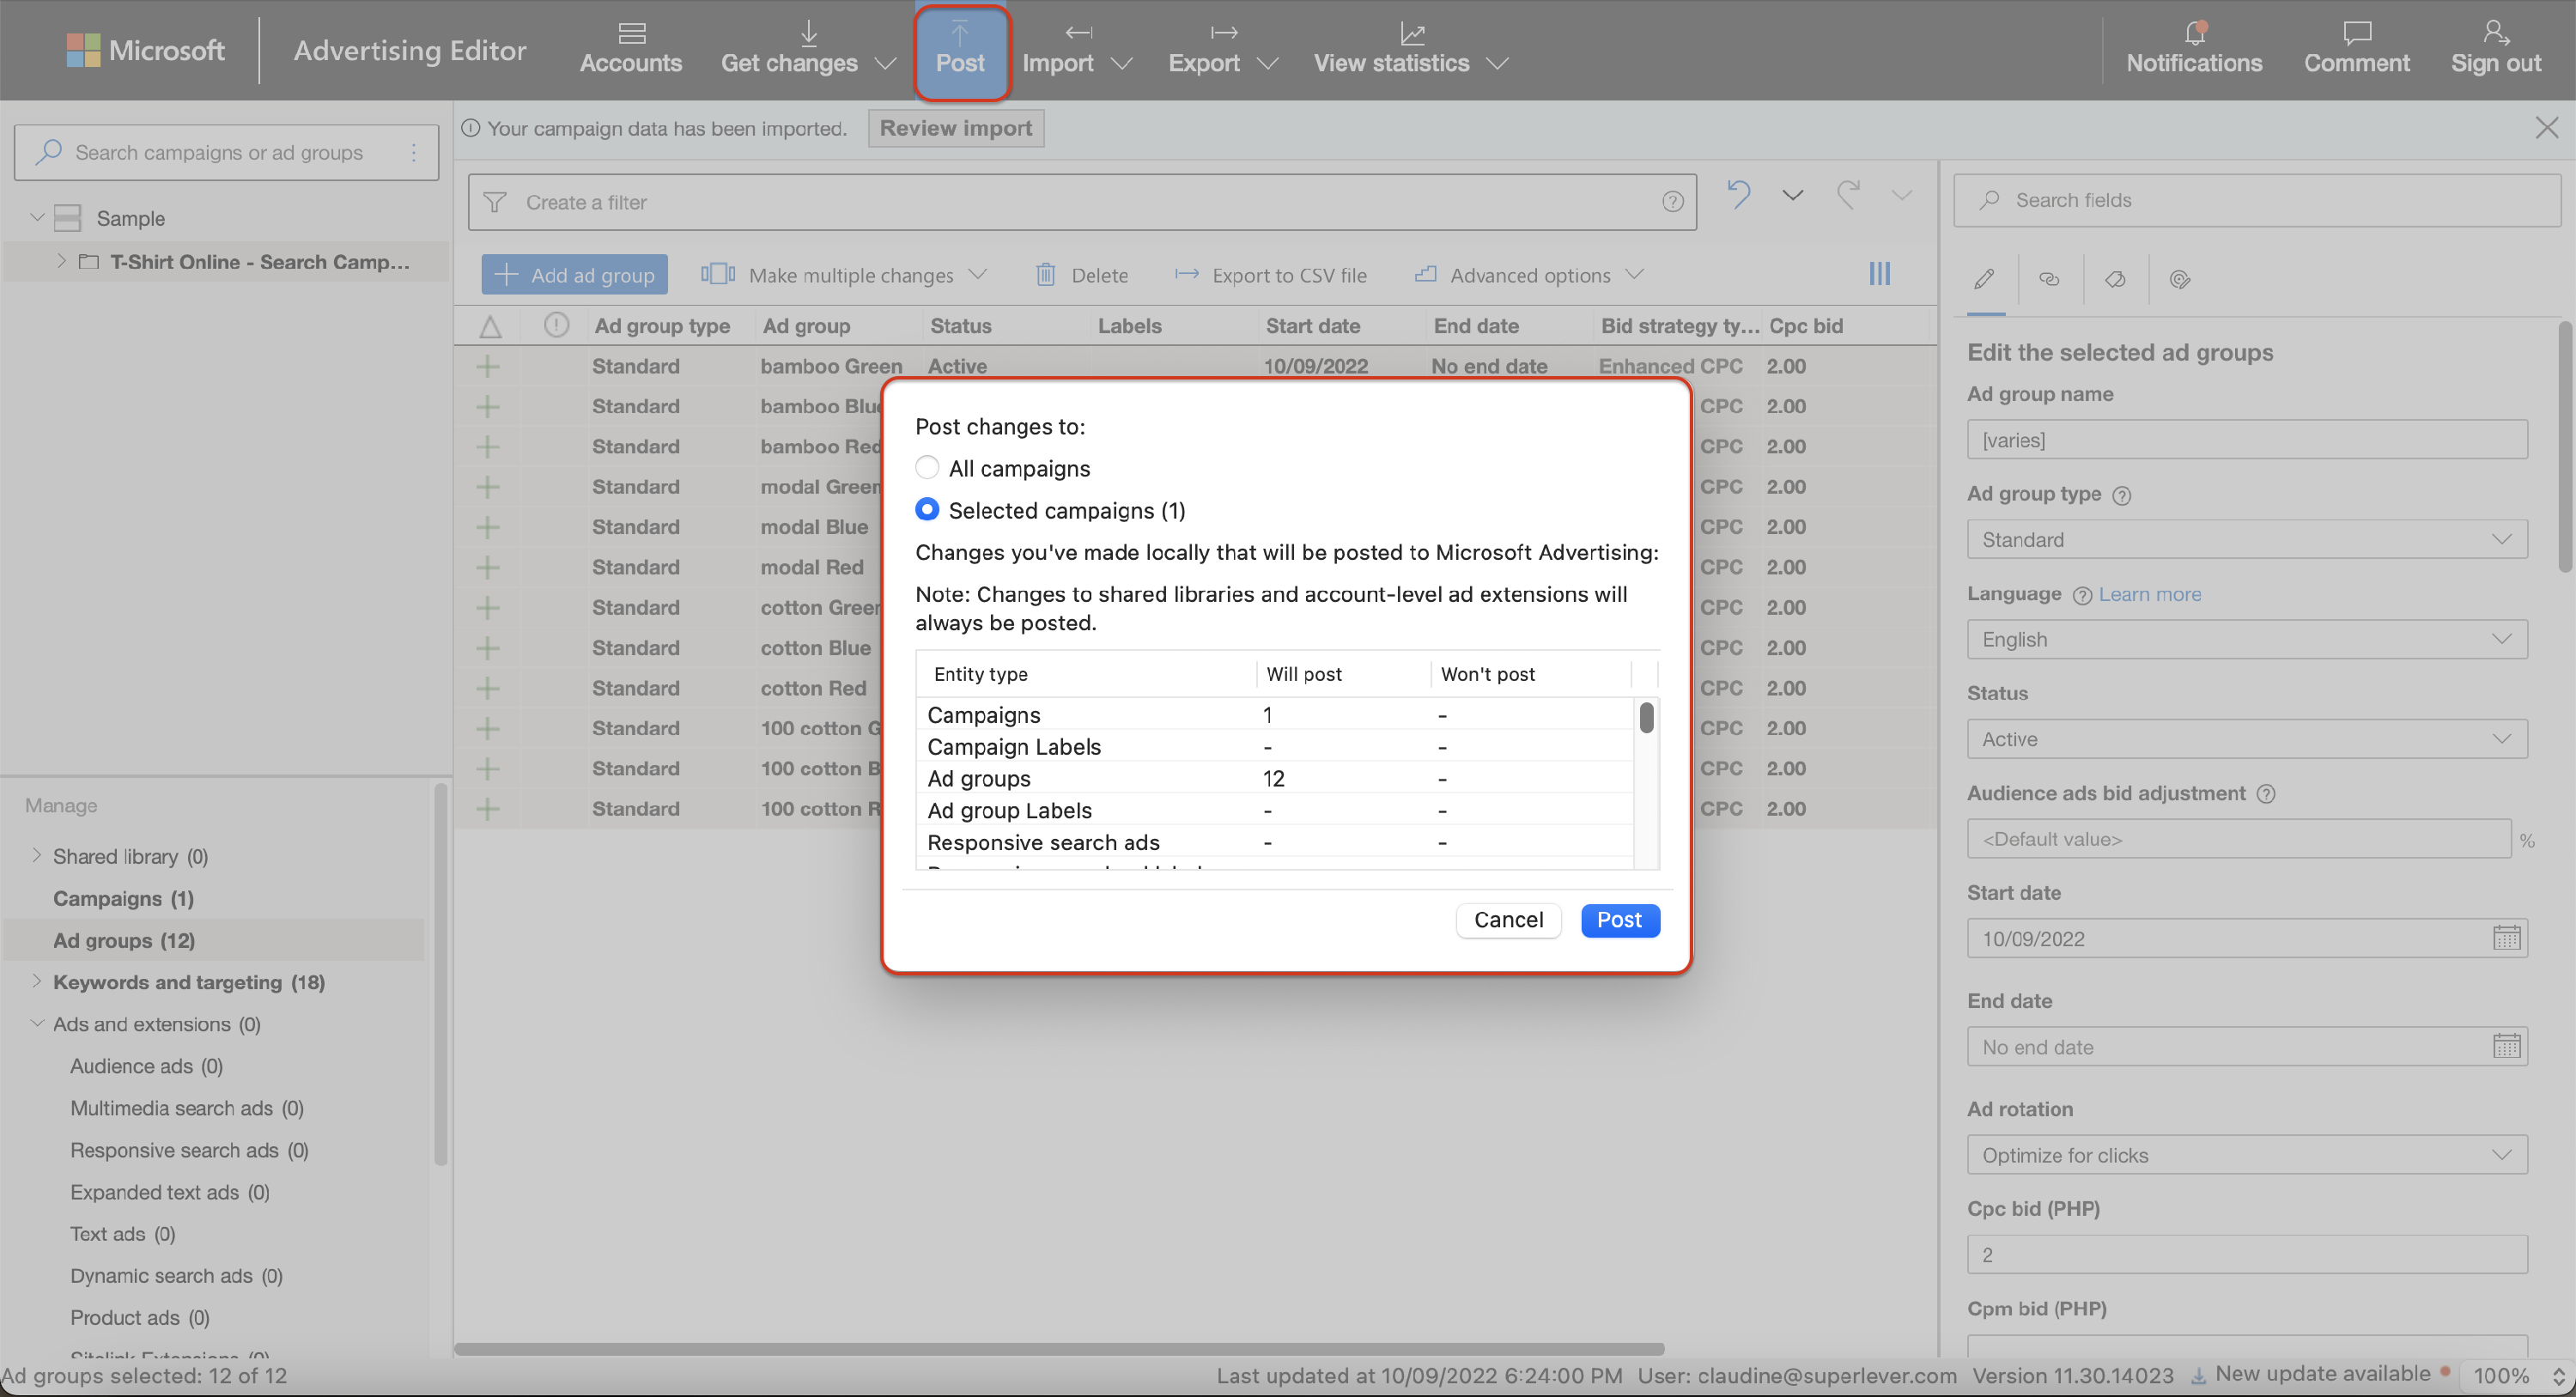
Once you're done addressing the errors, you are now ready to post your new campaign details to your live account. Click Post on Toolbar, then review the details. Click Post to upload the changes on your live account.
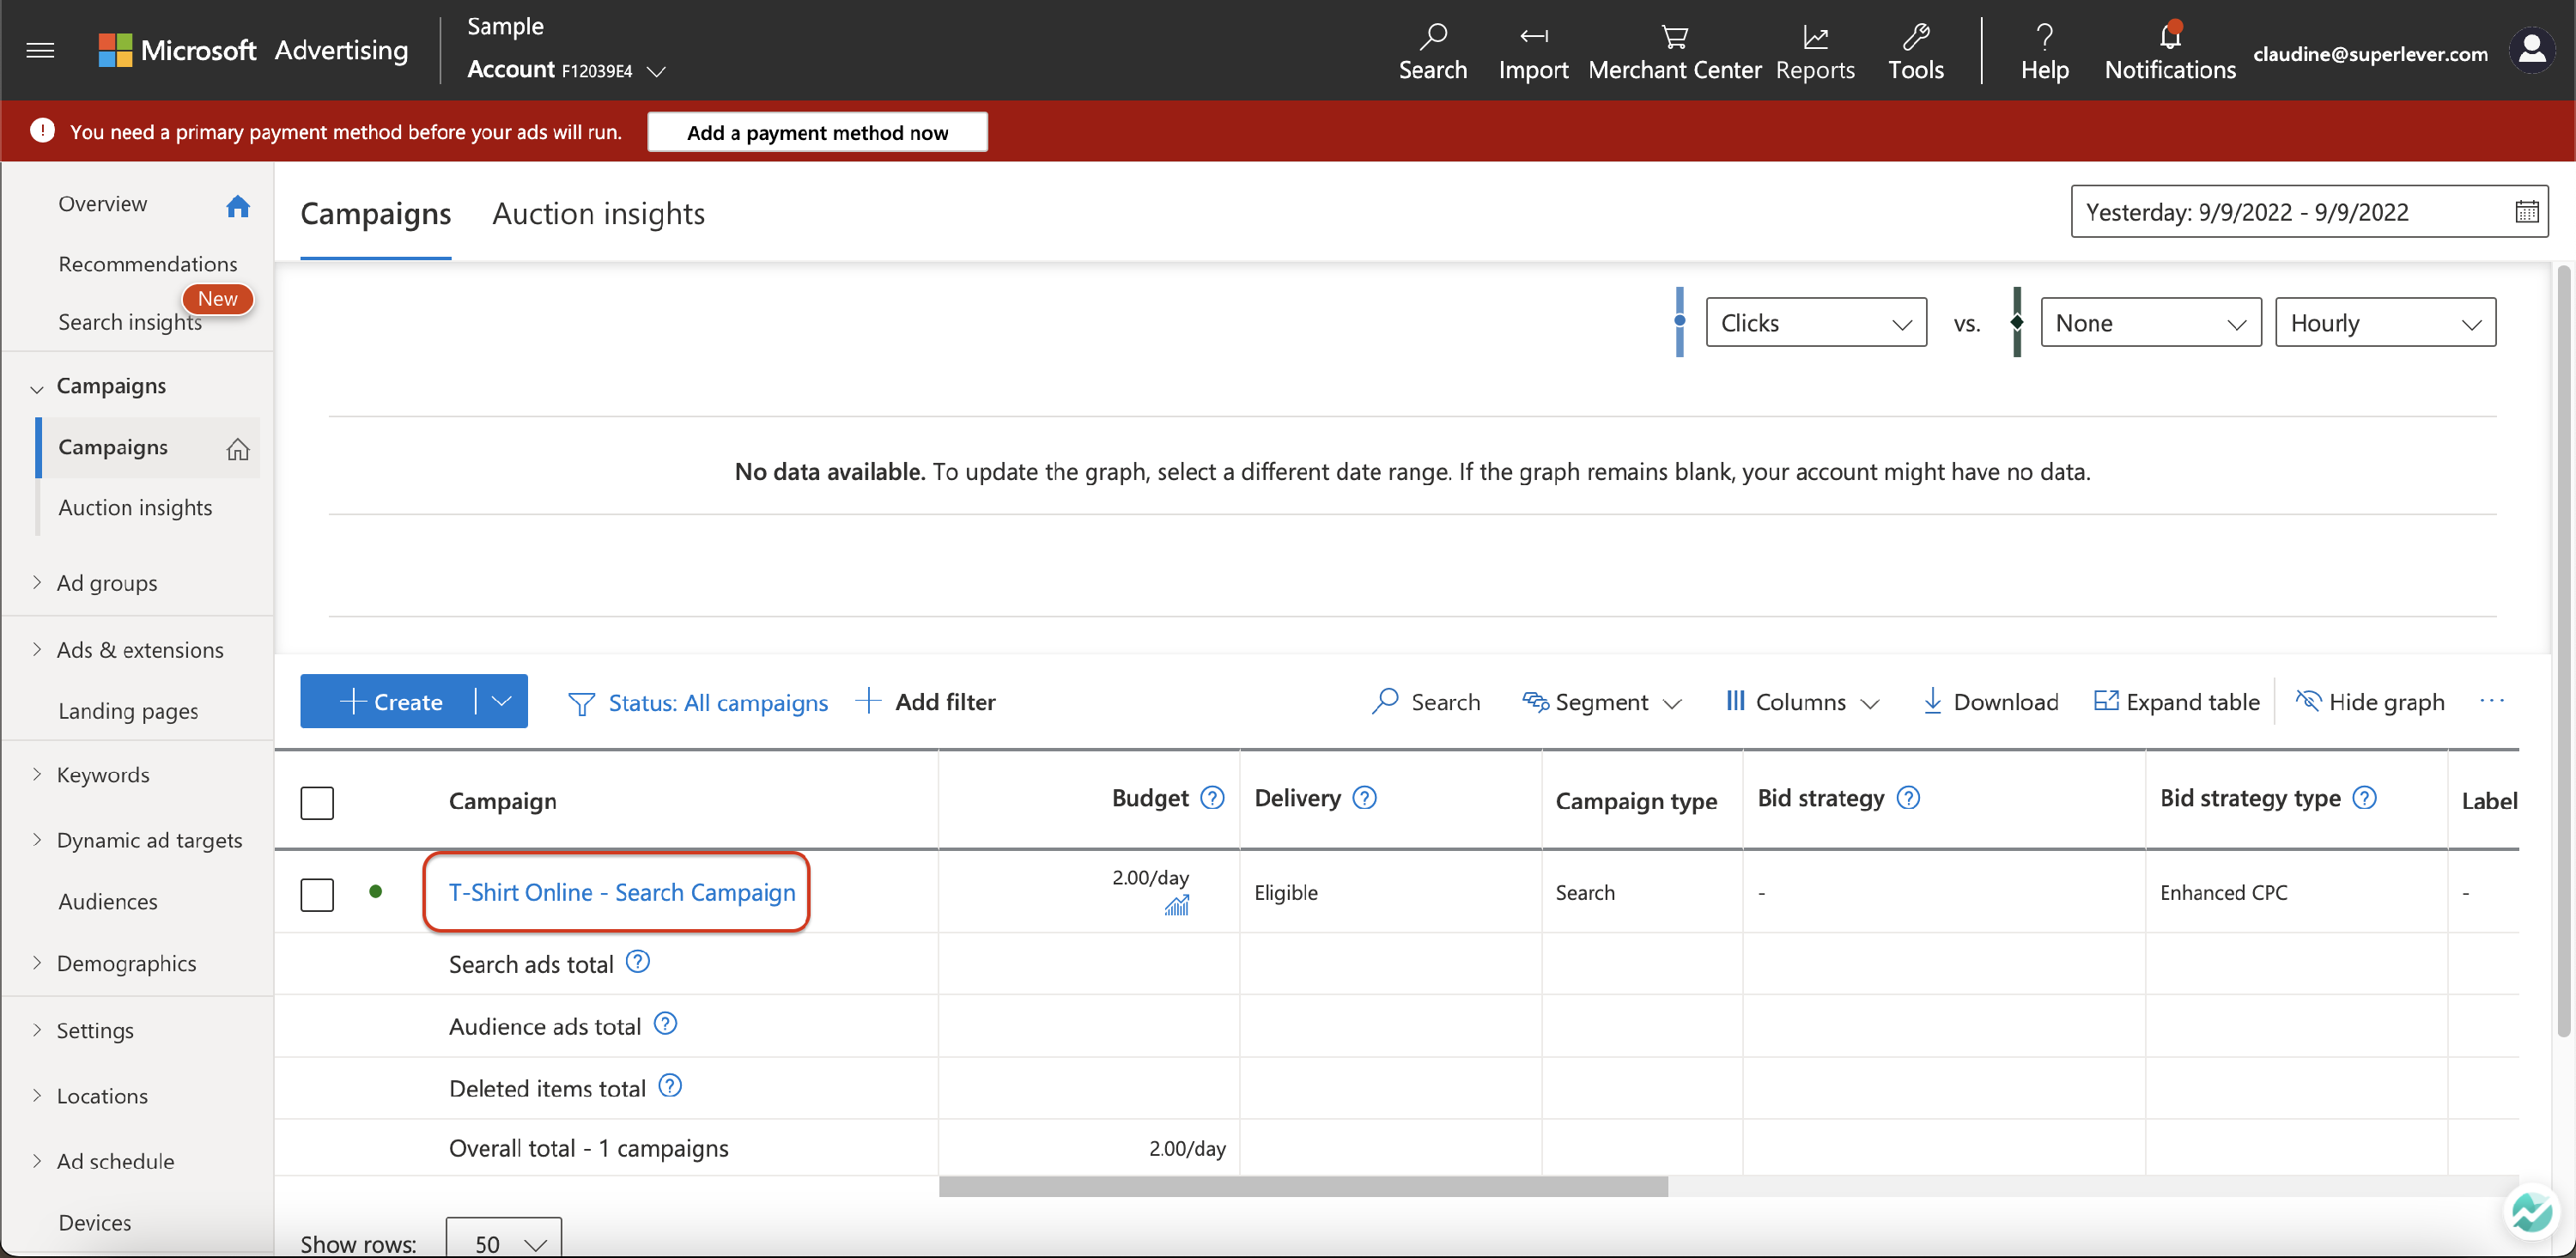
11. Finally, check the newly imported campaigns on your live account.
FAQs